An Introduction To The Mandelbrot Set That Doesn’t Mention Complex Numbers
Note: This post assumes you’ve heard of the Mandelbrot set before, and you want to know more about it, but that you find imaginary and complex numbers (e.g. the square root of negative one) a bit mystifying and counterintuitive. Instead of helping you understand the relevant math like a reasonable person would, I’m just going to pretend the concept doesn’t exist, and try to explain how to generate the Mandelbrot set anyway.
My goal is for this post to (theoretically) be acceptable to the historical René Descartes, who coined the term “Imaginary number” because he did not believe such things could possibly exist.
I hereby formally invite you to a dance.

Since we’re (presumably) both cool, hip people, let’s go with a somewhat avant-garde dance that’s popular with the kids these days.
I call this dance the Mandelbrot Waltz, but you can call it whatever you’d like. This dance follows very simple rules, with the quirk that your starting location will influence your part in the dance. You will unfortunately be cursed to dance forever (there’s always a catch to these dance invitations!), but if you ever touch the edges of the dance floor, the curse will be lifted and your part in the dance ends, so it’s really not all that bad...
In case you don’t already know the moves, I’ll describe how to do the dance yourself (if given an arbitrary starting point on the dance floor) step-by-step.
How To Perform The Mandelbrot Waltz: A Step-By-Step Guide
Preparation:
You will need: Yourself, an empty room, and a drawing tool (like chalk or tape).
Setup: Draw a line from the center of the room to the nearest part of the wall, like so:
Now, draw a circle around the room’s center, such that it intersects the “orienting line” halfway through. It should look something like this:
Note that drawing on the floor is totally optional; if you can keep this all in your head, good for you.
Starting Position:
Choose a starting point anywhere you want in the room. Remember this position—or jot it down on a notepad if your memory is bad—for later.
Step 1 - Rotation Doubling:
Imagine a line connecting your current position to the center of the circle:
Find the orienting line we drew on the floor earlier, and measure, counterclockwise, the angle between it and your new imaginary line.
Rotate yourself counterclockwise by that same angle, maintaining your distance from the center, like so:
It’s okay if you end up making more than a full 360° rotation, just keep on going around the circle until you’ve doubled the initial angle. For example (assuming the red point is your original position, and the black point is where you end up):
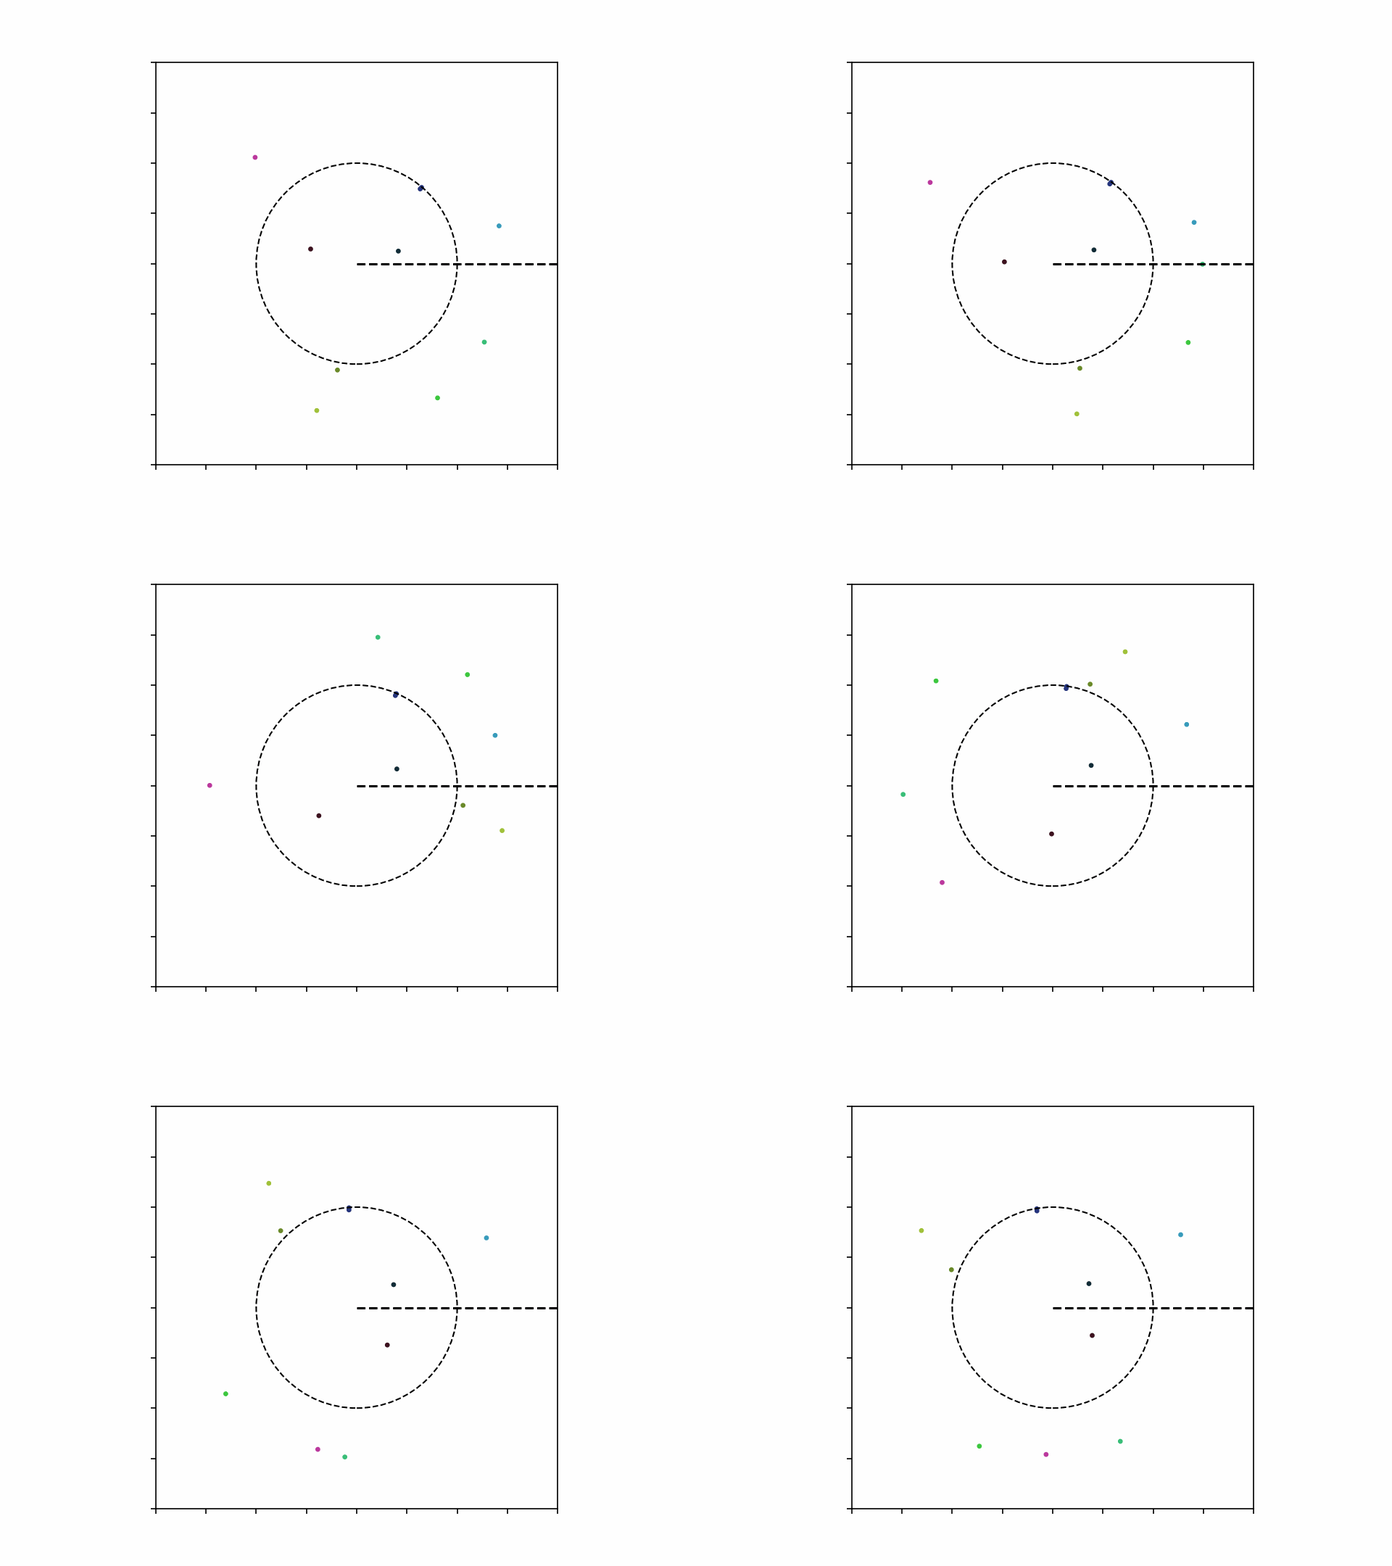
It should be intuitively clear that the further counterclockwise your starting point is from the orienting line, the further you’ll travel. In fact, if your starting point is 360° from the orienting line—meaning you start off directly on top of it—doubling your angle will lead you 360° around the circle and right back to where you started. This means that if you get a few friends, and have them all do this step of the dance at the same time, their collective movement will look like this from a bird’s-eye view:[1]
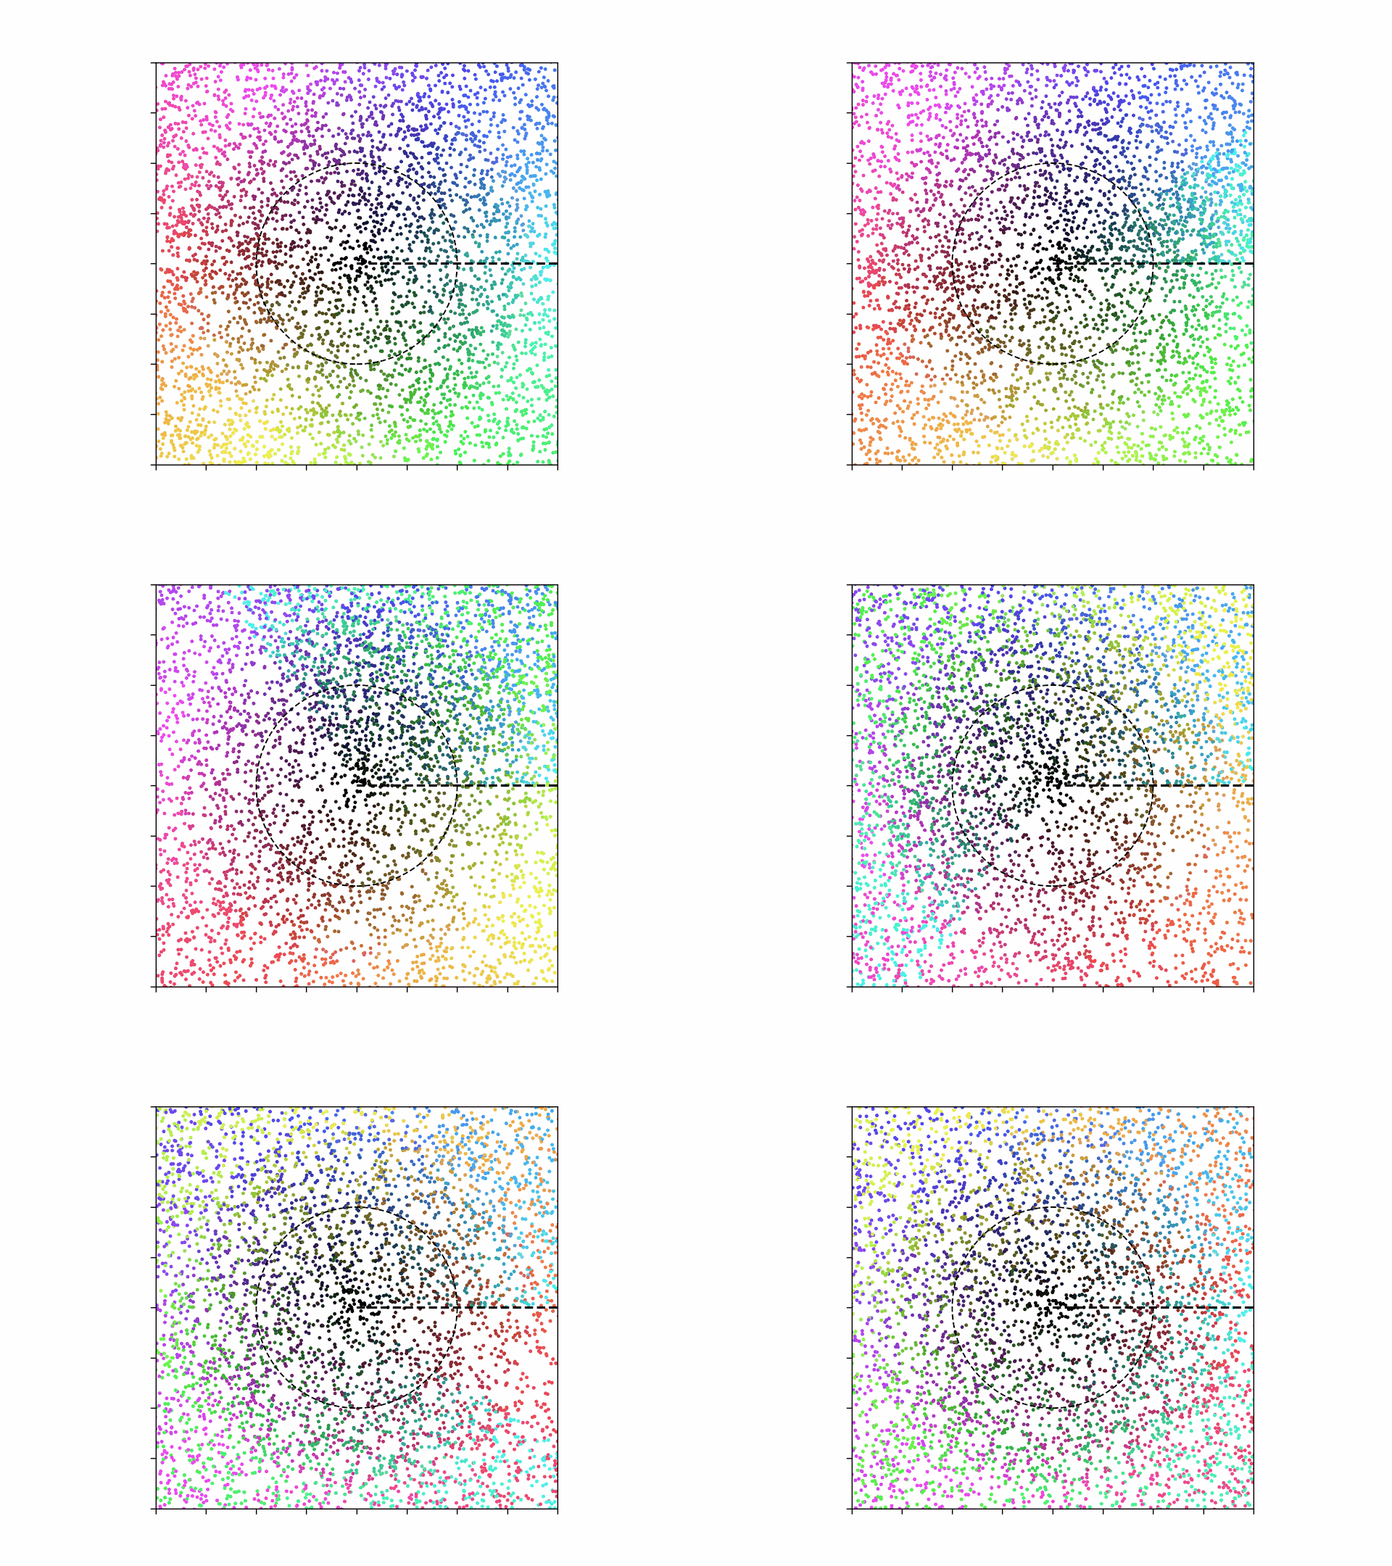
And if you have a lot of friends doing Step 1 at the same time, it will look something like this:
Also, how do you have so many friends!?!?
Step 2 - Distance Adjustment:
Imagine a number line, going from 0 onward:
Take the number line, and imagine placing it on the floor, so that it goes from the center of the room towards (and past) you. The end of the line marked with number 0 should be at the center of the room, and the number 1 should land on the perimeter of the circle we drew. It should look something like this:
Note the number on the number line that corresponds to where you’re standing. For instance, if you were standing on the red dot in the above example, your current number value would be something like 1.6 or so. (I totally didn’t cheat and find that number by looking at my source code.)
Now, take that number, and square it (a.k.a. multiply that number by itself).
If you’re not a math person, don’t worry—that’s what the calculator app on your phone is for! ;)
Seriously though, all this boils down to is that if your number is exactly 1 it stays the same (1-->1), if it’s smaller than 1 it gets even smaller (e.g. 0.5-->0.25), and if it’s bigger than 1, it gets bigger (e.g. 1.6-->2.56)—and the change is more extreme the further away from 1 you start at.
Move to the point on the number line which is equal to that (squared) number:
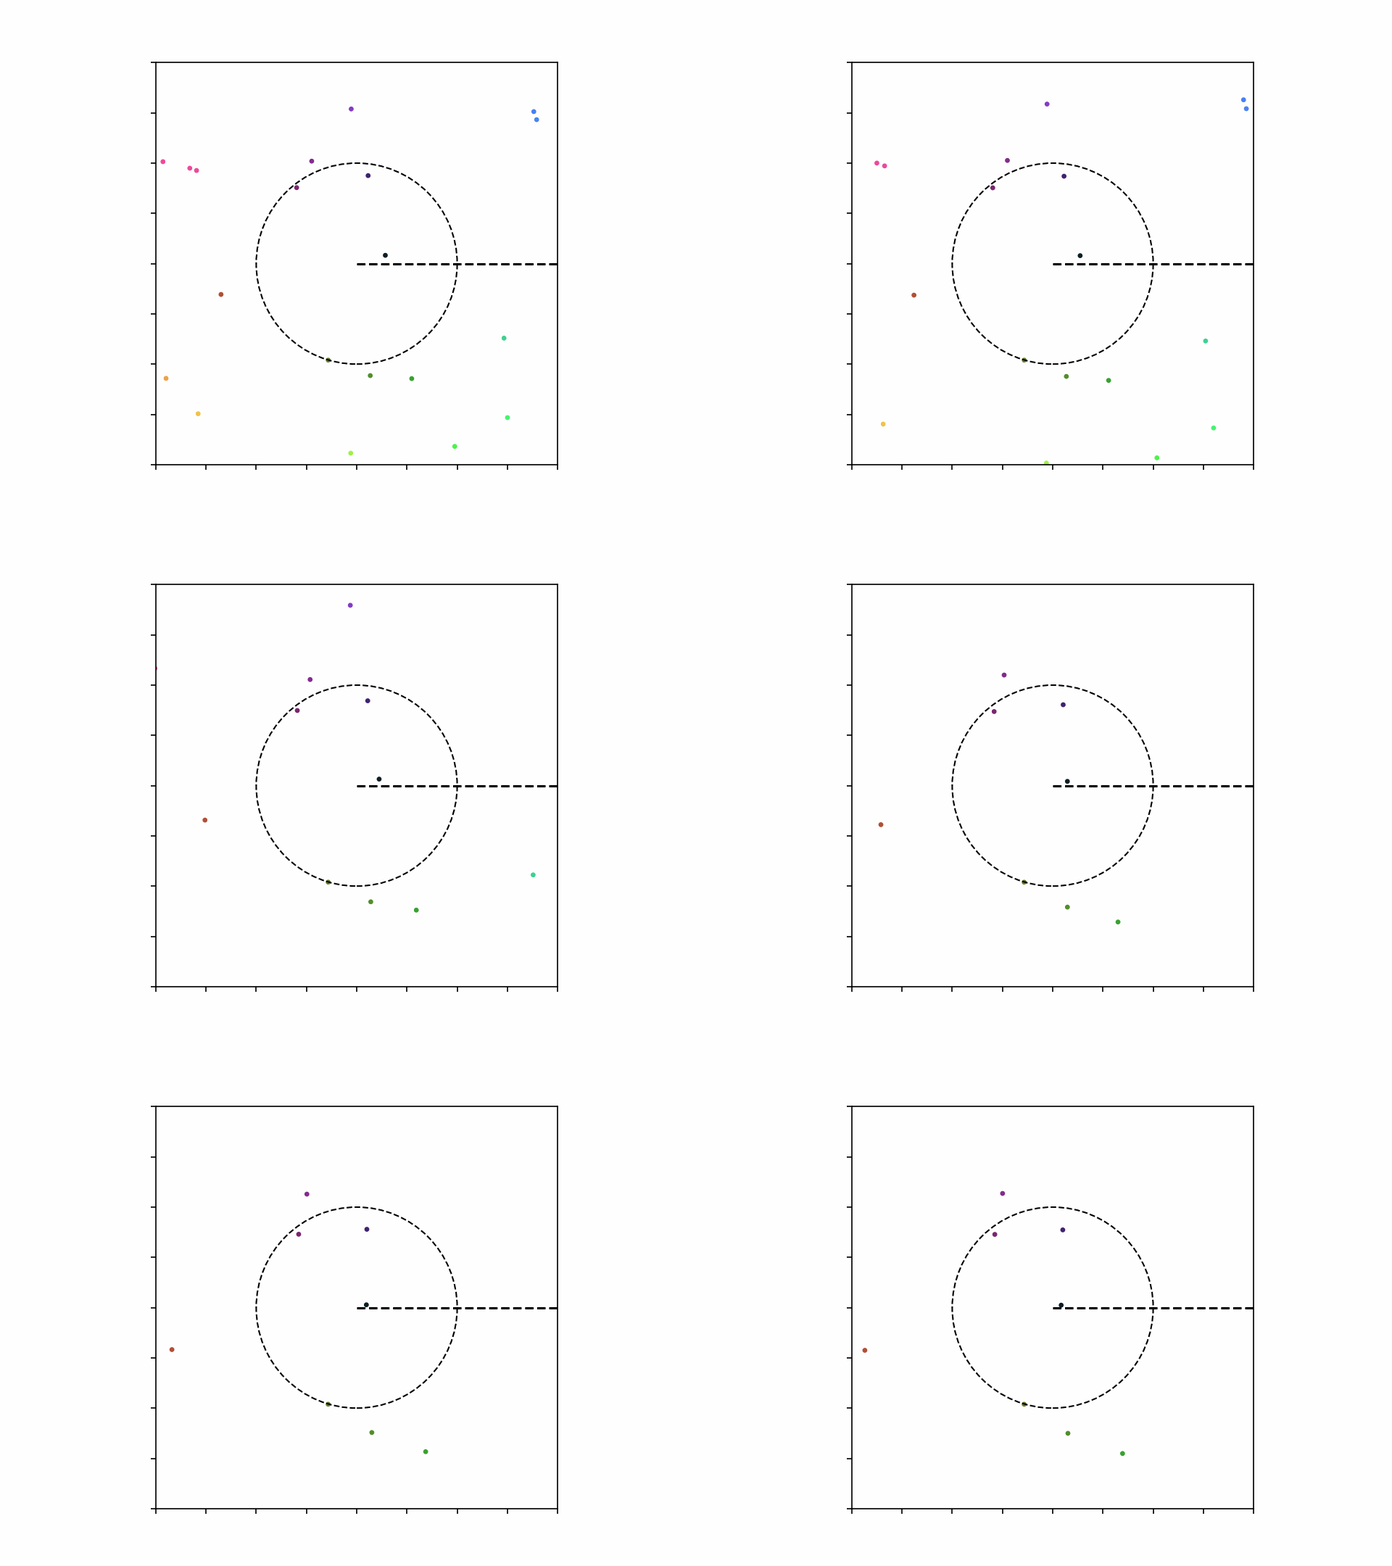
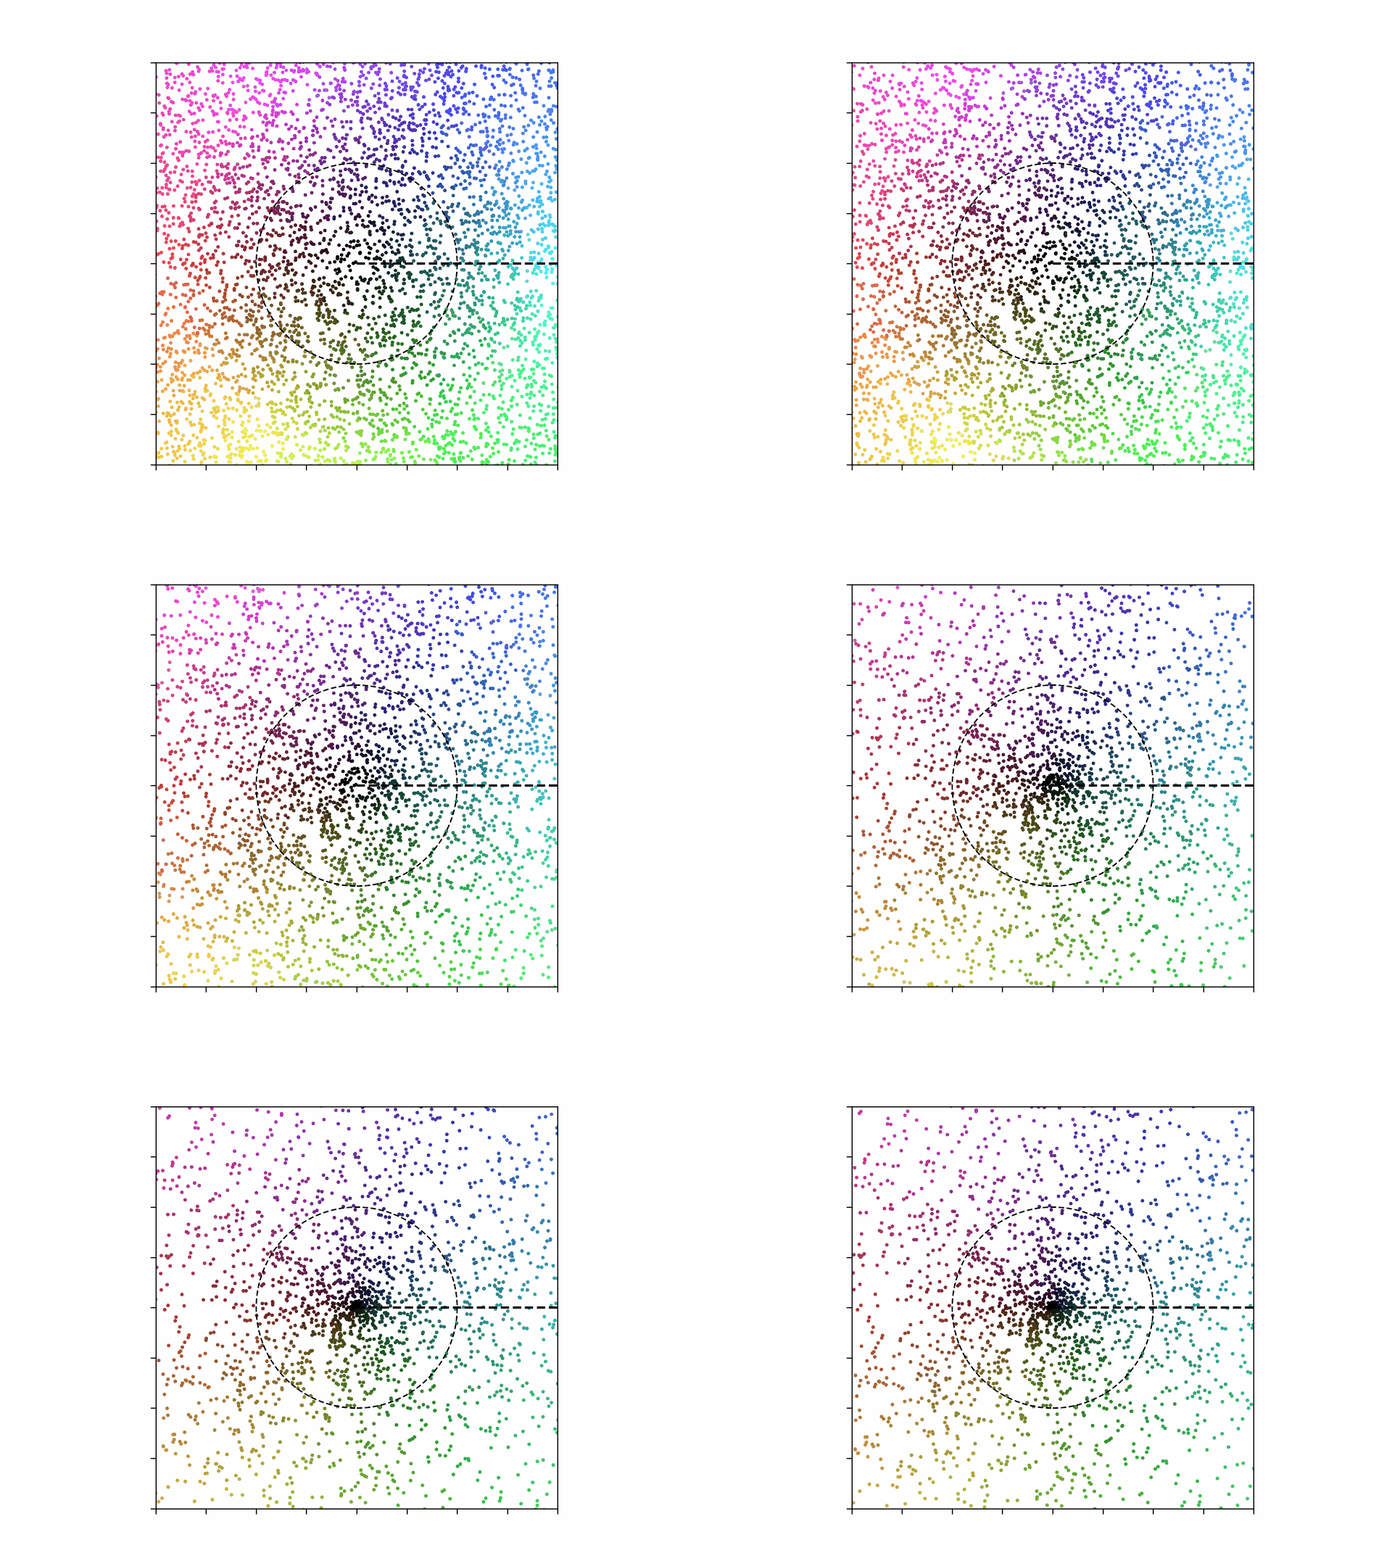
This means you’ll be moving towards the center of the room if you started Step 2 inside the circle, and will be moving outward if you started outside it. To illustrate, if you get a few friends, and have them all do this step of the dance at the same time, their collective movement will look like this from a bird’s-eye view:
And here’s what it looks like if you have a lot of friends doing Step 2 at the same time:
Step 3 - Re-positioning:
Remember where you originally started at the very beginning of the dance. (Keep in mind that your original starting position is not necessarily the same position as where you were on step 1 if you’ve been dancing for a while and repeating these steps multiple times over.)

Visually overlay this memory on top of the current scene, but move it a bit so that the center of the circle is directly on top of your current position. You can visualize it like so if you want:
Move to where this mental image now puts your “original position” relative to yourself.
This step of the Mandelbrot Waltz is arguably the “secret sauce” to its deceptively complex beauty, but it can’t really be animated by itself as a single step, since it depends on the dancer(s) having already moved from their initial positions. Otherwise, if you began step 3 in the exact same place as their starting position, you’d just double your distance from the center, like these dancers do:
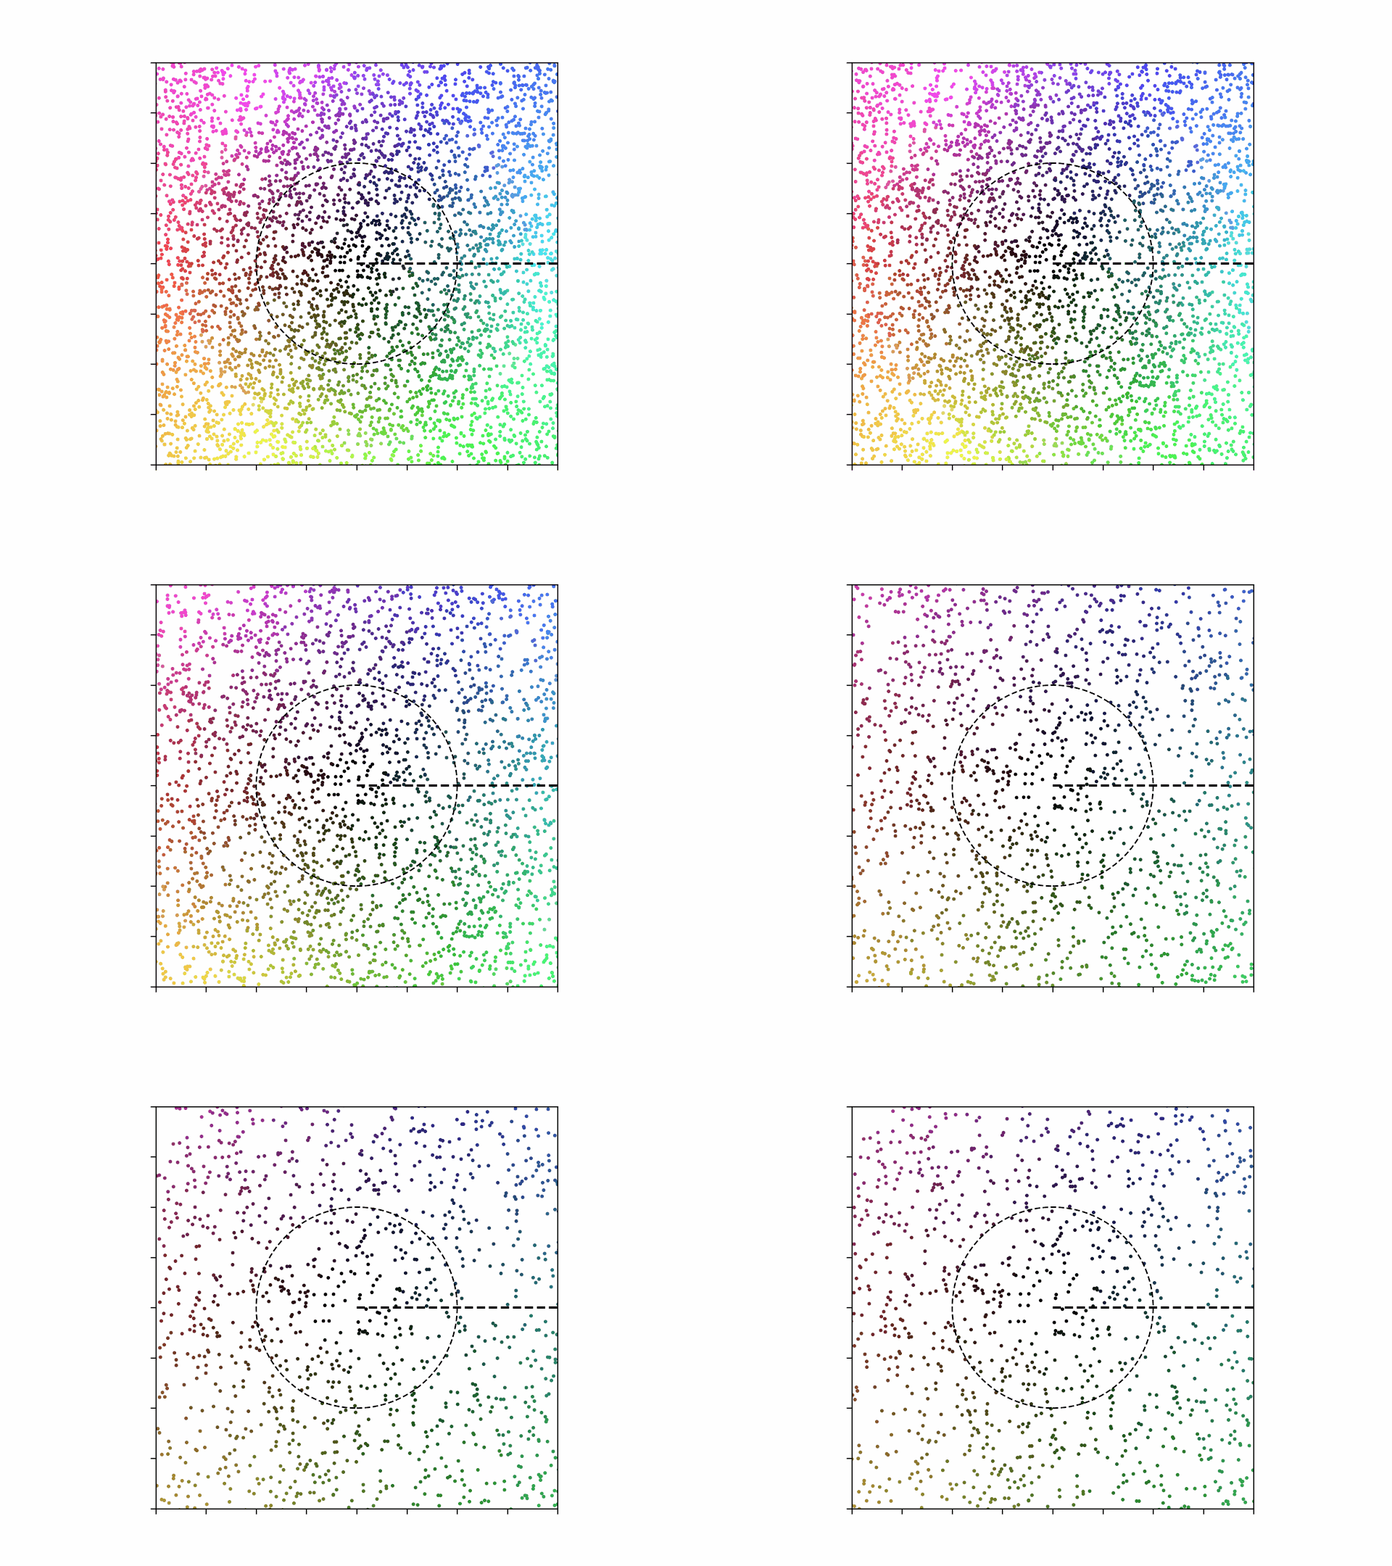
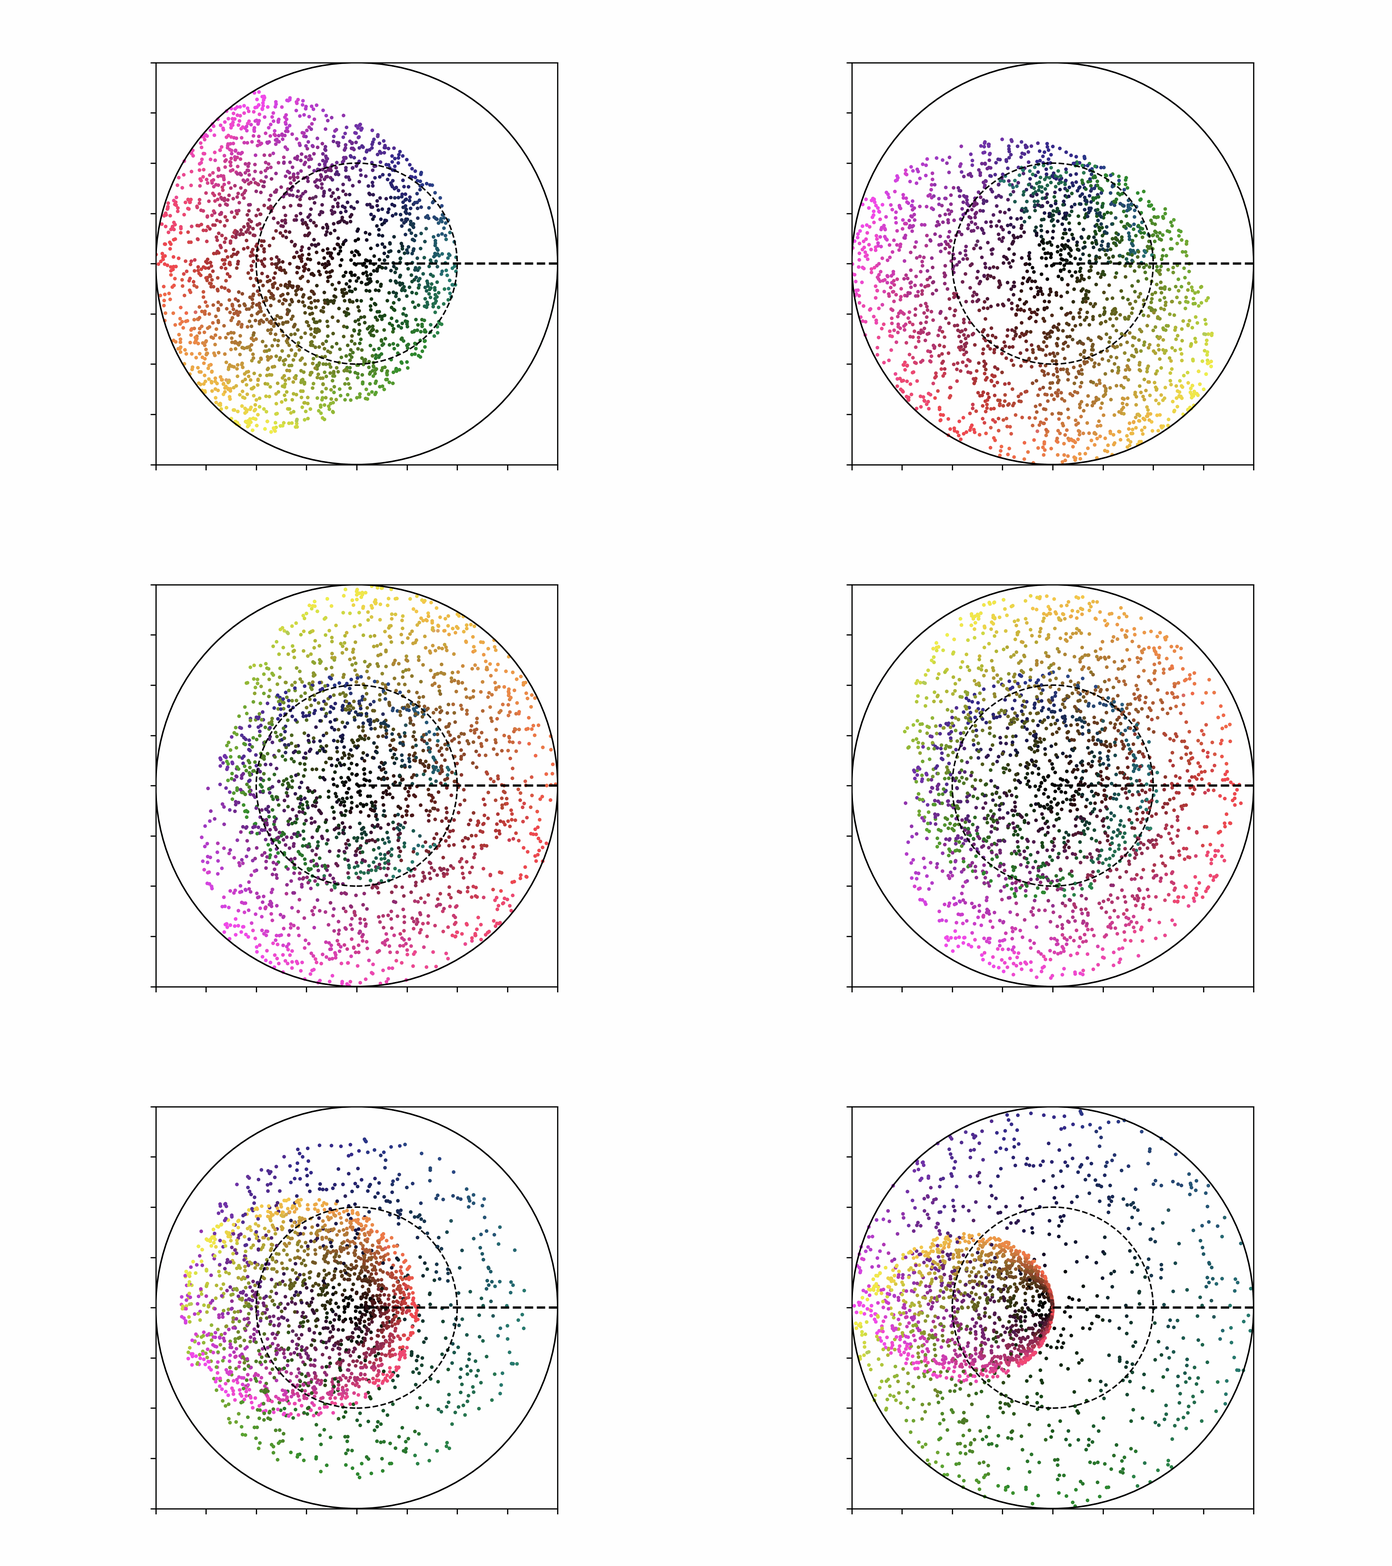
So putting it all together, what does dancing these three steps in order look like? Let’s randomly place some friends on the dance floor, and start dancing for one round of three steps!
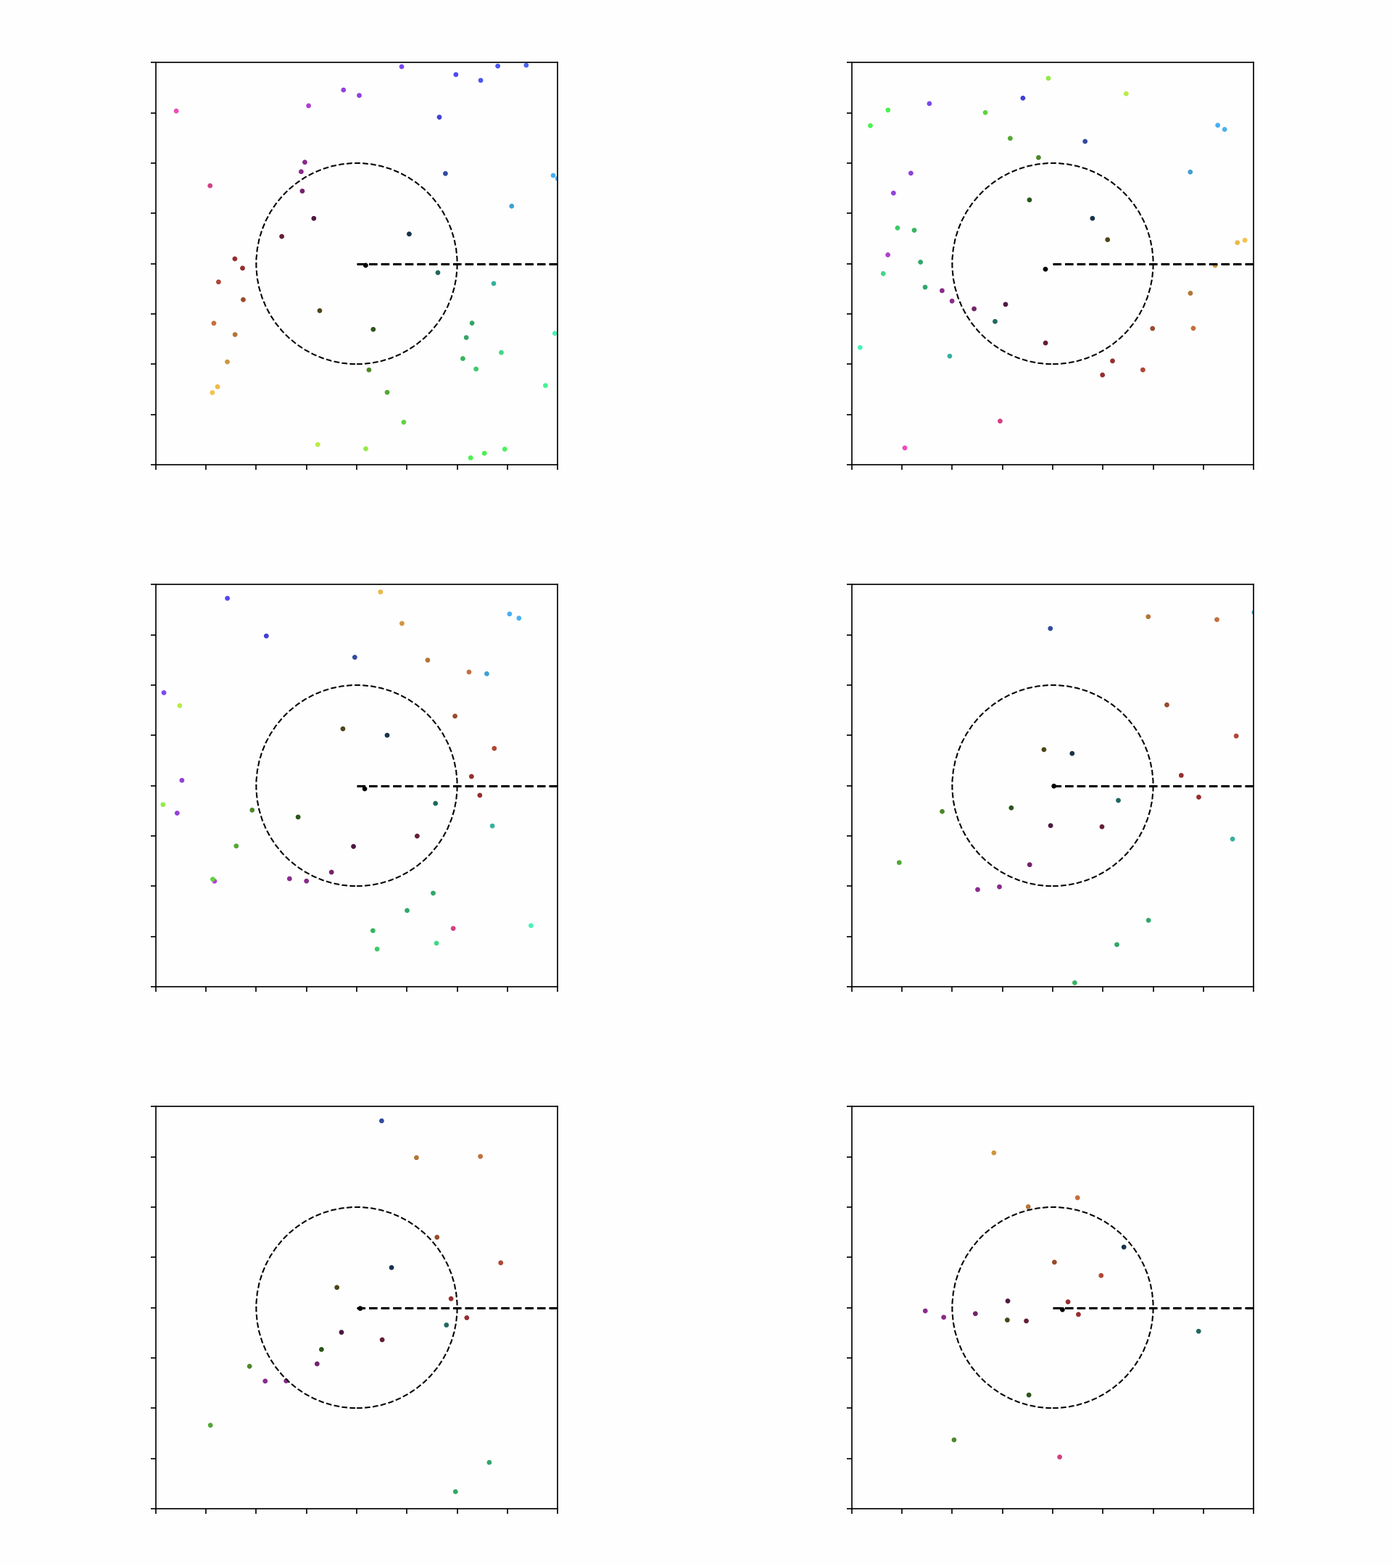
With a few hundred more friends, the first round (of steps 1, 2, and 3) will look something like this:[2]
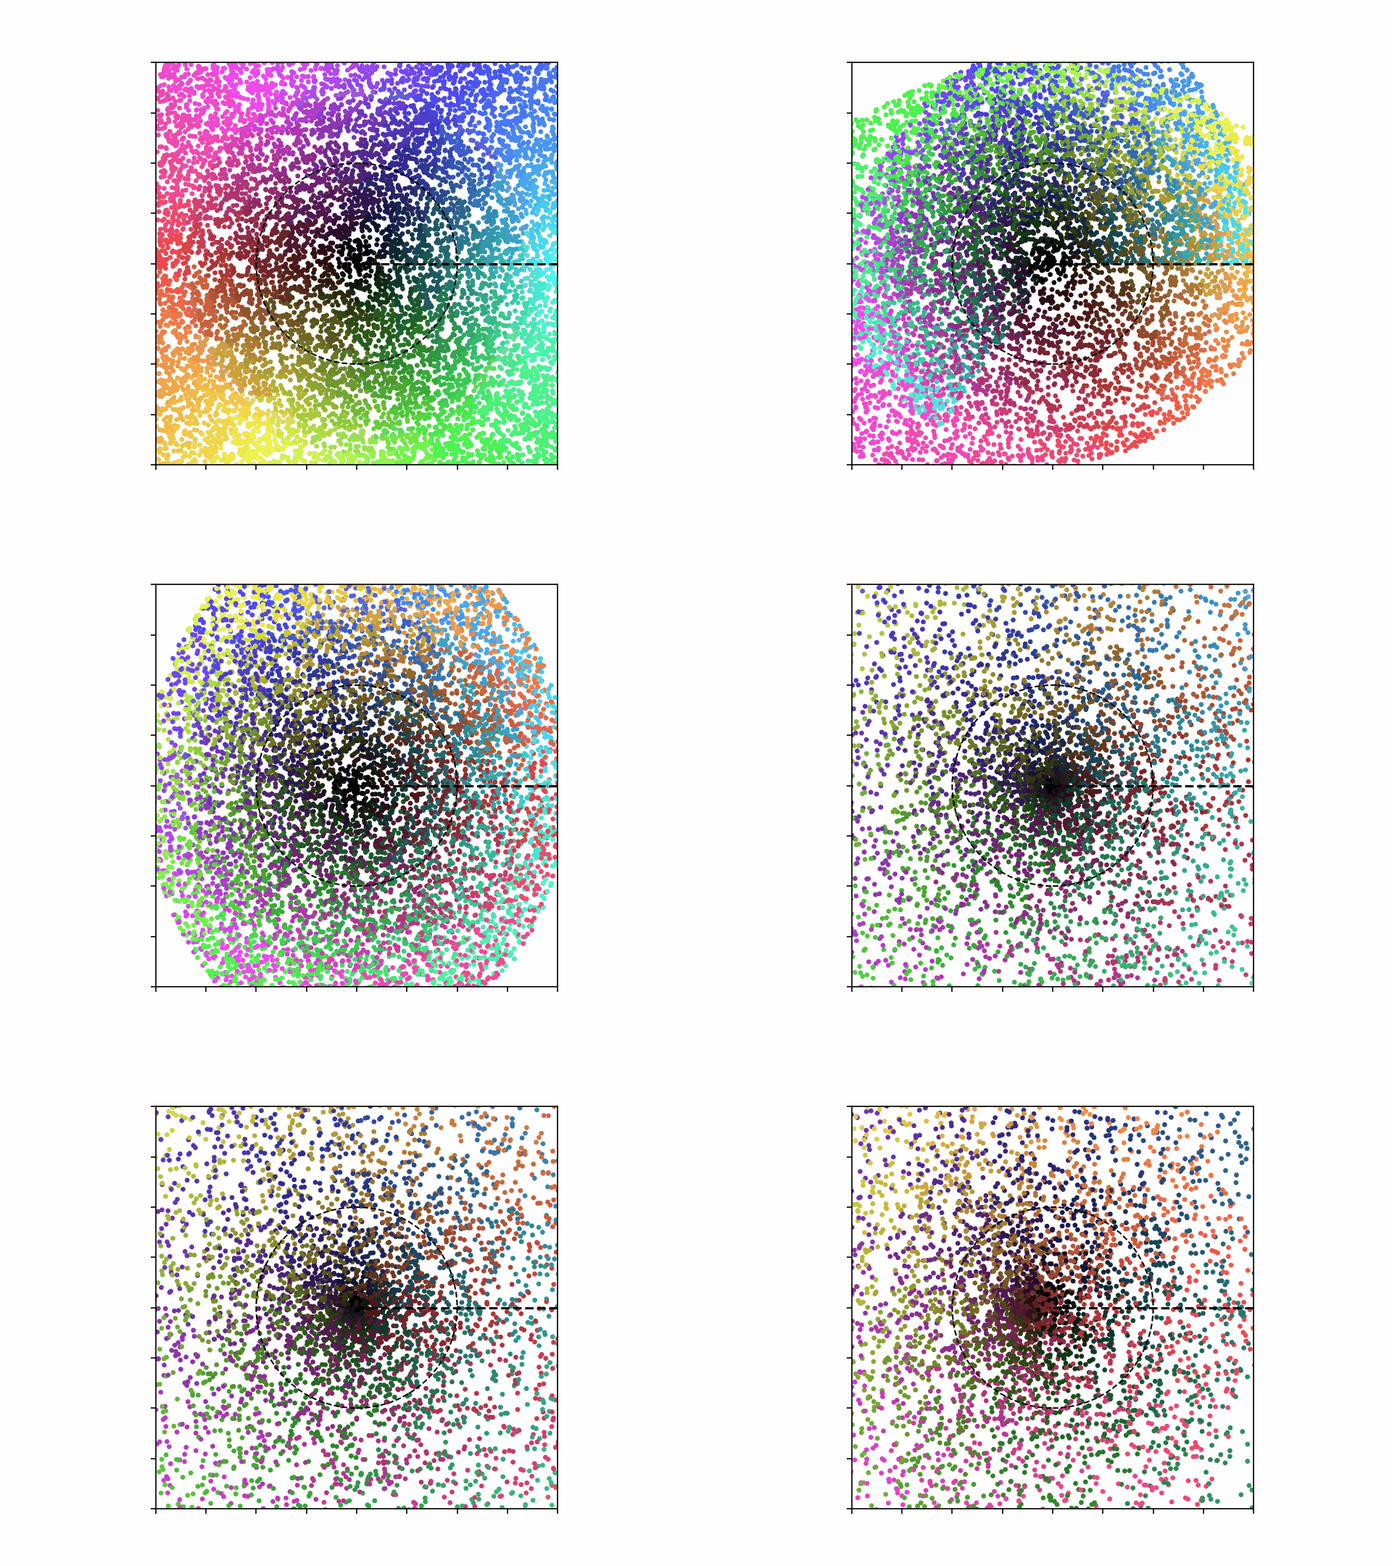
This might look relatively basic now, but one great thing about the Mandelbrot Waltz is that every time you dance another round, the formation the dancers end up in will get more and more interesting.
Repeating the Steps:
Once you’ve finished a round (of steps 1, 2, and 3), if you’ve found yourself hitting a wall at any point, your part in the dance is now over. You can now relax, and go enjoy a cocktail or something
with the other losers. :)If you haven’t hit the wall so far, go back to the start of Step 1 and begin a new round. Rinse and repeat for eternity, unless or until you hit a wall.
That’s all there is to it! :)
Now you too can waltz the Mandelbrot with ease! Sit back, relax, and, enjoy this GIF of a whole bunch of randomly arranged dancers doing a full Mandelbrot for 25 rounds in a row:
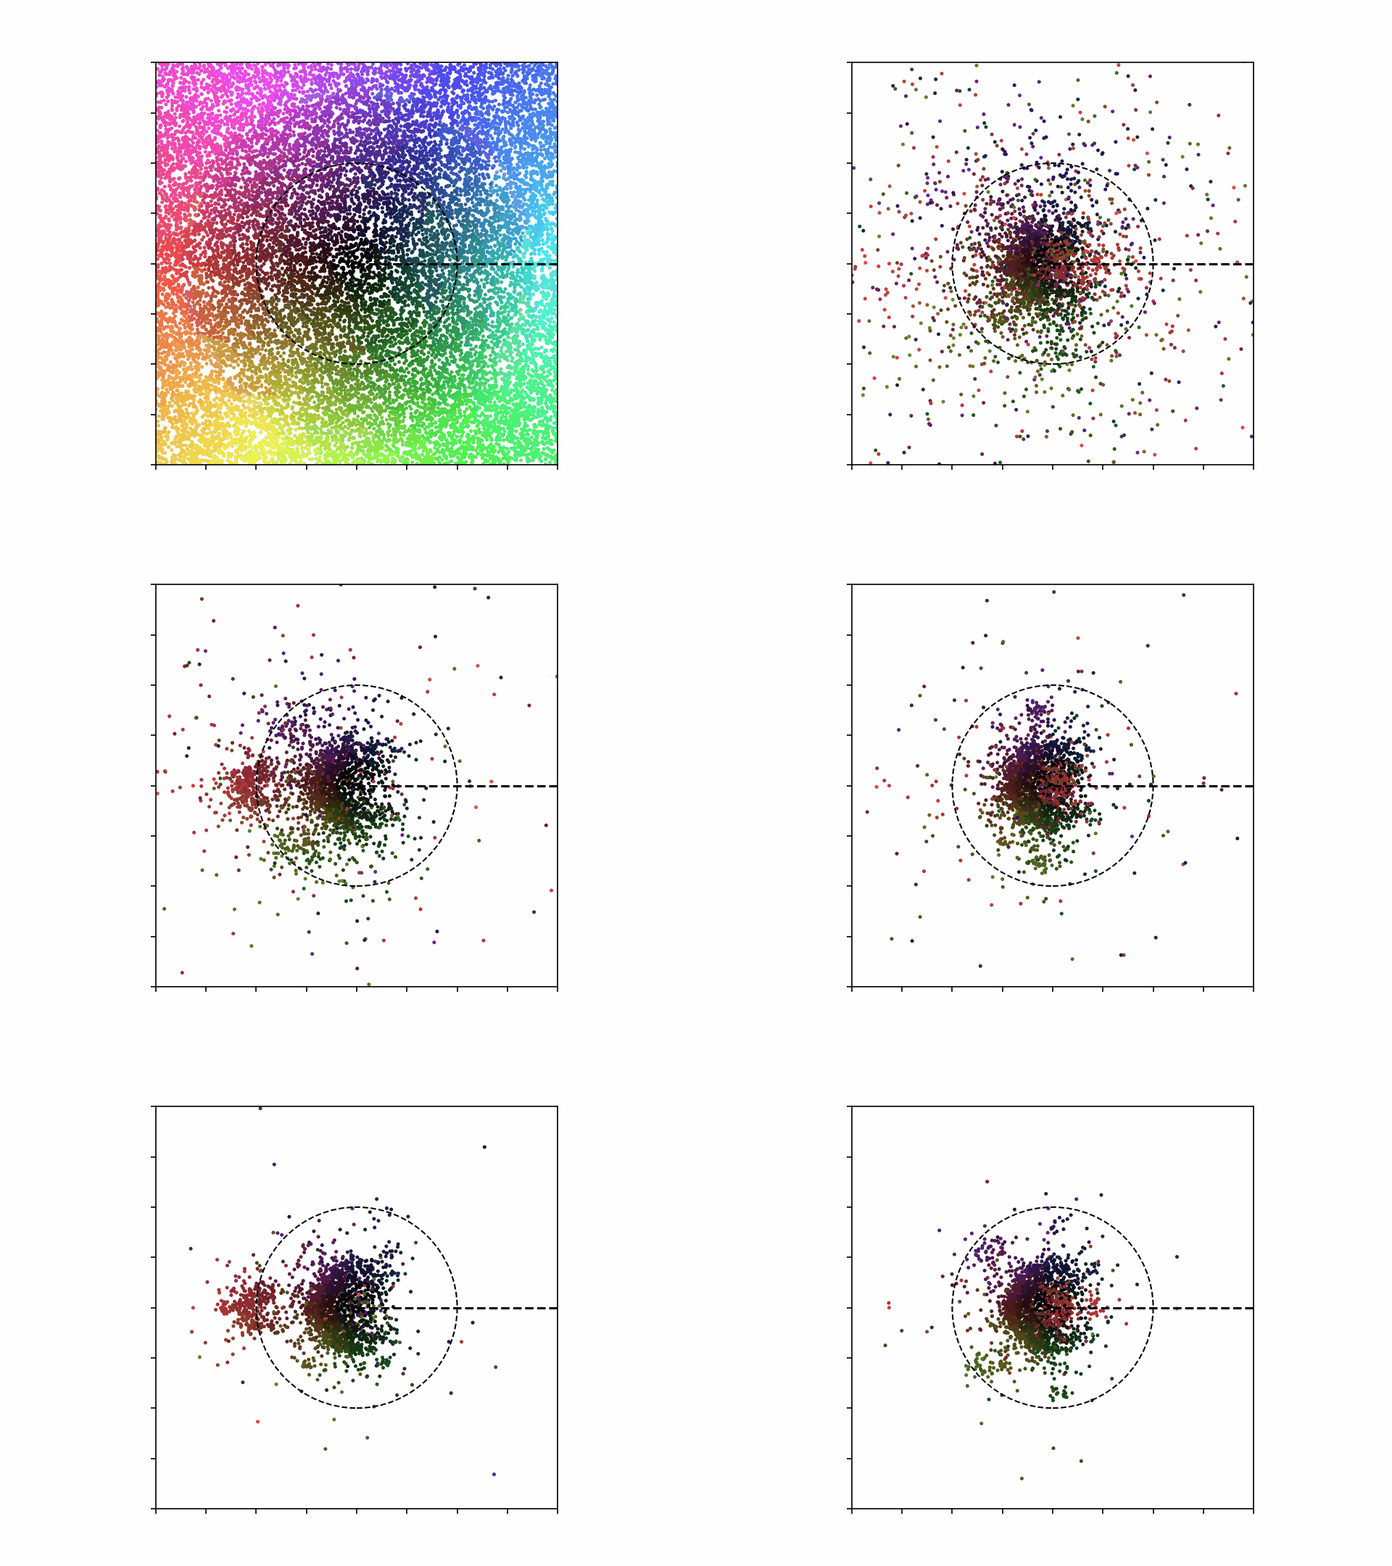
Well, well, well… now this is interesting! It looks like while most of the dancers bonked into the walls and were knocked out of play, a smaller subset of the dancers have moved into a regular-looking pattern and are making and unmaking some sort of complex shape. It seems reasonable to assume that the remaining dancers know how to waltz the Mandelbrot very well indeed, and most (with the exception of some at the edges perhaps) will probably stay stable in this dance forever.
What can we say about this set of infinite dancers, this… Mandelbrot set? Well, looking carefully at the GIF above, the Mandelbrot Waltz seems to be favoring dancers which start off inside of some well-defined area. Dancers inside this area never hit the walls, but dancers outside of it probably walk away with bloody noses from how fast they hit that edge.
In order to find the shape of this area, let’s do an experiment. Since we’ve already done the waltz at least once, we can interview our previous dancers and find out how many rounds each dancer lasted. If they only lasted one round, we’ll outfit them with a white shirt. If they lasted two rounds, we’ll reward them with a slightly darker shirt, and so on, with those who lasted to the very end of the dance getting pitch-black shirts as the ultimate honor. We’ll then tell them to start off in the same position they began last time, and set the music going! This way, a bird’s-eye view of the dance will let us pay attention to the “Mandelbrot set” of dancers which survives to the very end:
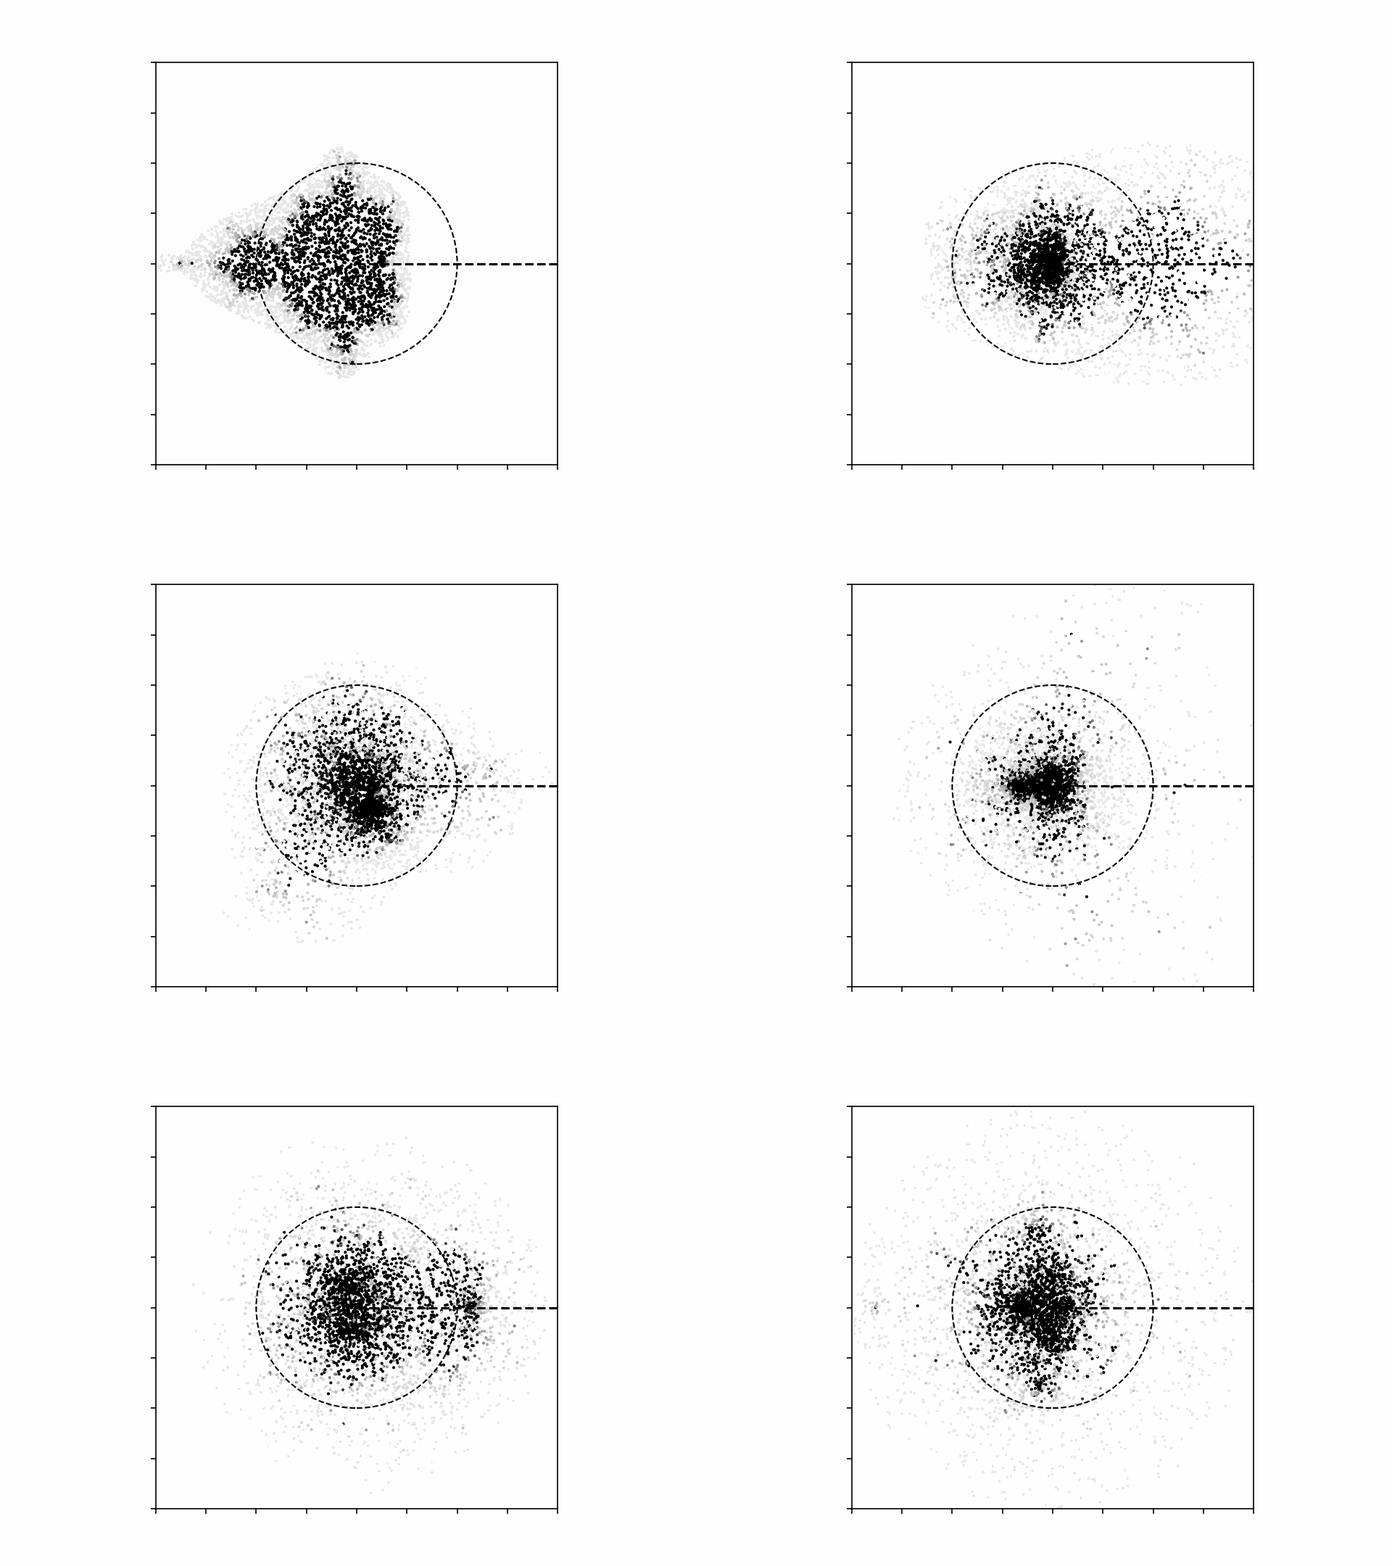
I only show the first three rounds here, since hopefully you get the basic idea, and I want this GIF to be playable online without crashing your computer.
If we had a lot more dancers, such that literally every point/pixel in the plane/dance-floor started with a dancer in it, then that initial starting shape would be “the” Mandelbrot set:
Notice that this shape is a fractal, and has an incredibly detailed and complex perimeter. In fact, the outer edge of the Mandelbrot set is so complex that (assuming an infinite number of infinitely small dancers) you can zoom in on it forever and ever, easily finding new patterns never seen before by human eye.
The Mandelbrot set forms one connected shape (rather than there being some parts which are disconnected from the rest), though sometimes the connections between larger areas (or “continents”) can be incredibly thin and delicate. If you want to zoom in and explore the details of the fractal yourself, I highly recommend Xaos, a desktop software tool which allows for real-time exploration of this delightful mathematical world. If you’d rather explore the set musically (perhaps to set your waltz to), I recommend playing with the incredible Fractal Music Generator.
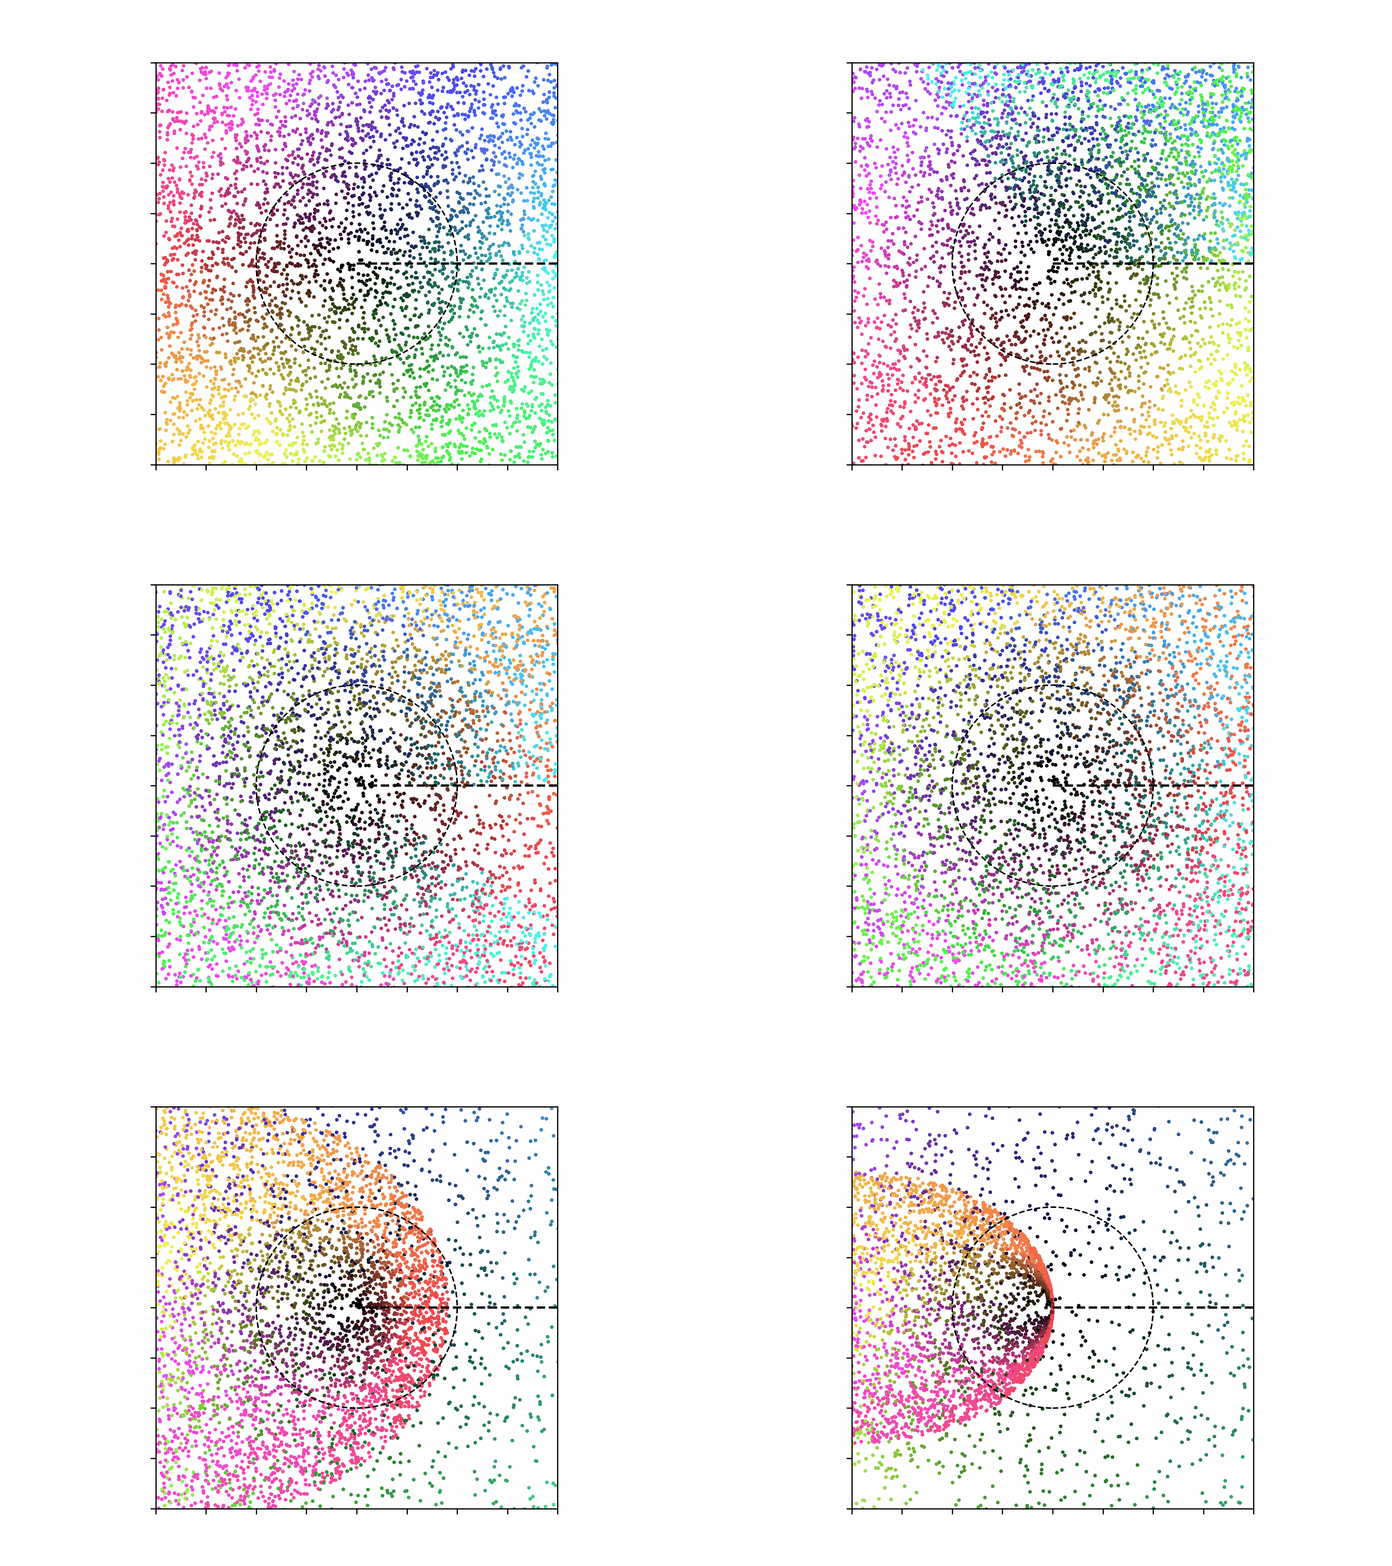
One cool aspect of thinking about the Mandelbrot set in the way I’ve set out above is that A) we can animate it in some really fun ways, and B) we can construct new fractals by changing the rules of the dance! If there’s interest I’ll do a separate post exploring some fun results I’ve gotten, but for now, I’ll just give a few examples of B).
To start, here’s what we get if we square the angle during step 1 instead of just doubling it:
And here’s what we get if for Step 2, instead of squaring the distance from the center (i.e. r²), we raise it to the negative power of itself (i.e. r-r):
Finally, if during Step 2 we simply set the distance from the center to always be equal to 0.3, then (turning the resulting fractal on its side) we get this lovely little heart:
The possibilities are endless, and I encourage you to experiment with the Mandelbrot Waltz yourself. I’ll link the source code I used to create the above visualizations here when I next get the chance to upload them, but it’s also worthwhile to try your hand at your own interpretations. Feel free to share anything you create :)
I hope you’ve enjoyed this brief exploration of one of my favorite topics in visual mathematics! I see the Mandelbrot Set as emblematic of the many fascinating intersections between Math and Art, and hope this post can help make the beauty of these connections accessible to more people.
Happy dancing!
Note: if anyone is interested in performing the Mandelbrot Waltz as I described it in real life (especially with a large group of simultaneous dancers), please let me know—I’d be fascinated to see how it would play out in messy real-world conditions.
- ^
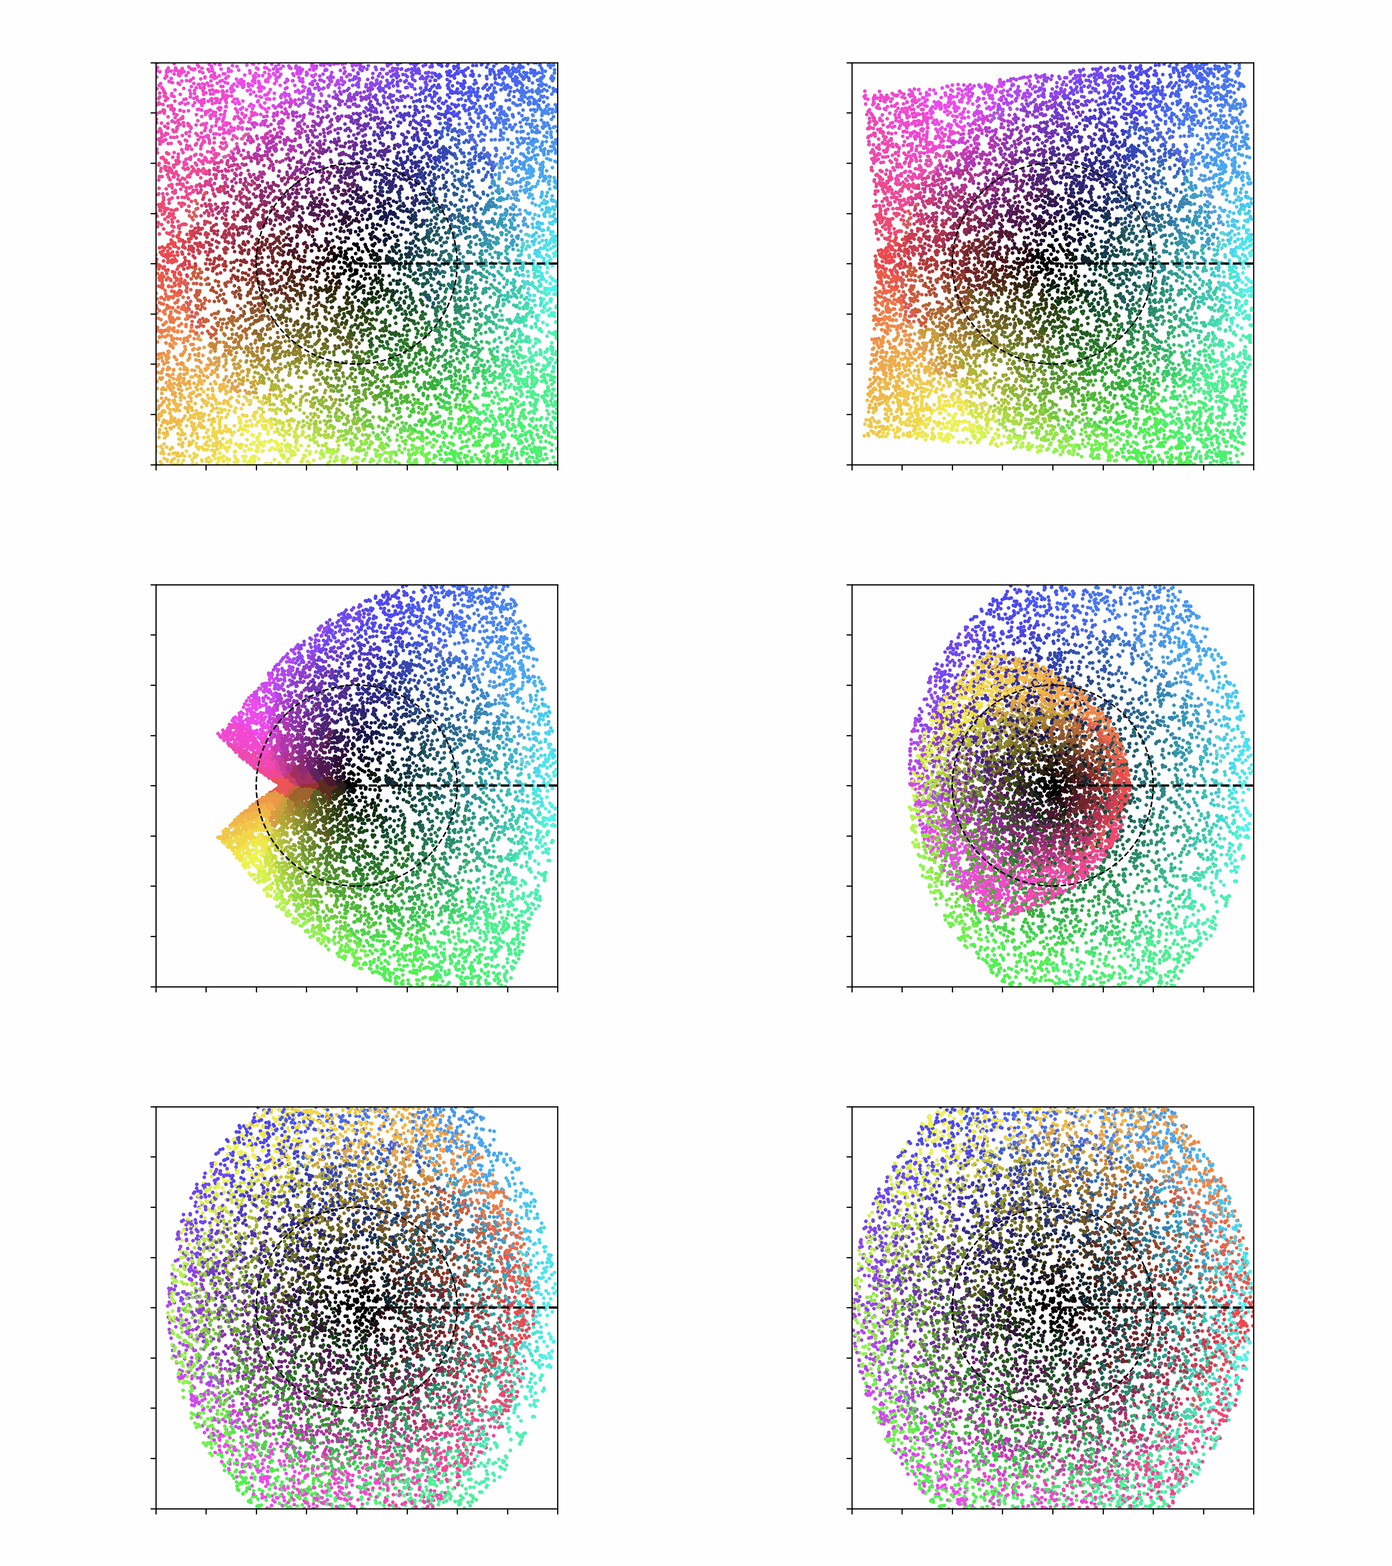
Note that this visualization assumes that the dancers are all rotating around the central point as they move to their destination. If they just made a direct beeline for their end-goal, this is what step 1 would look like instead:[4]
Step 1 depicted as a linear (rather than rotation-based) movement Either way is fine; how exactly you want to implement any of these steps is really up to you, as long as you end up in the same place!
- ^
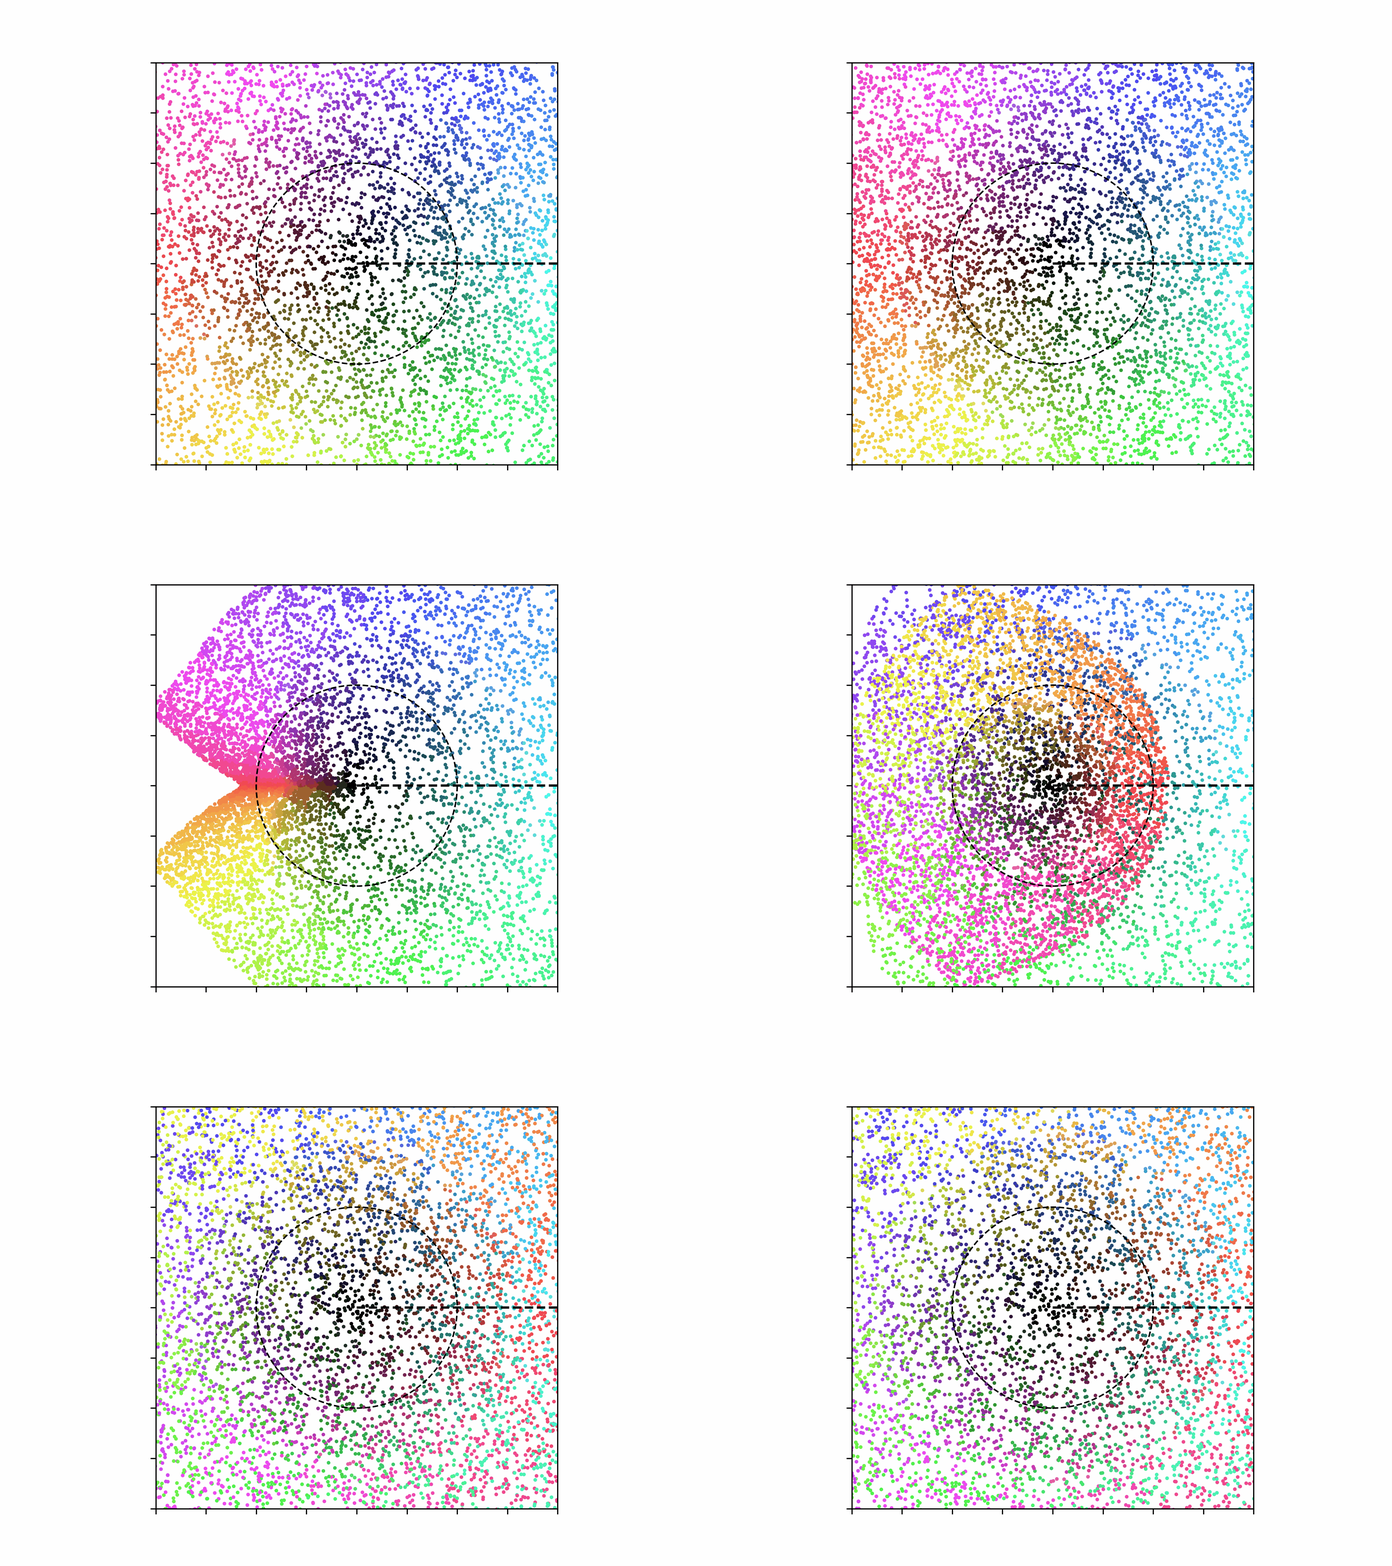
Meanwhile, this is what it would like like if the dancers just did step 1, skipped step 2, and went straight to step 3:[3]
Dancers doing only steps 1 and 3 - ^
Here’s what it would look like if I were stricter with the animation and only started with points which reached the edge of the box and no further:
And here’s what it looks like if I only render points which stay within a circle of radius 2 (which may be of interest to those already familiar with traditional methods for rendering the Mandelbrot set):
Steps 1 and 3 - ^
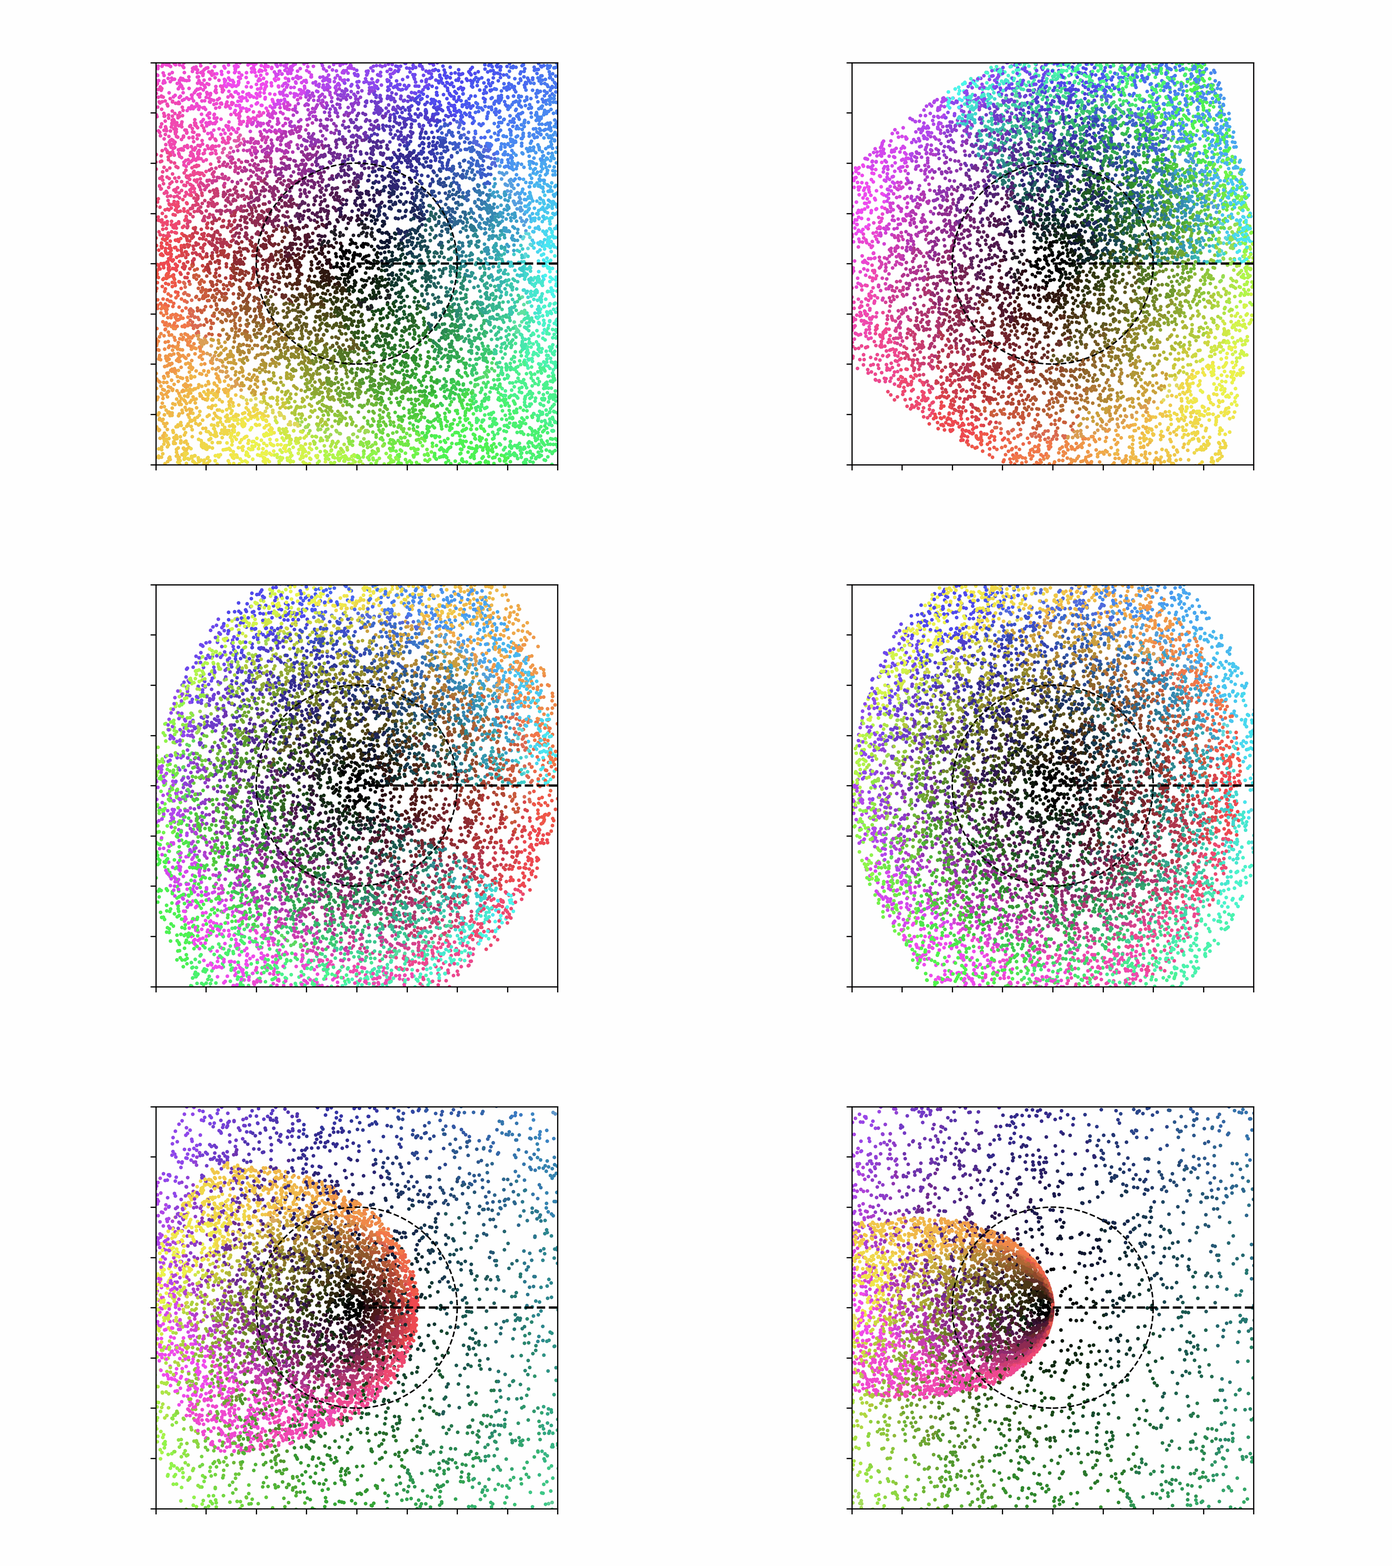
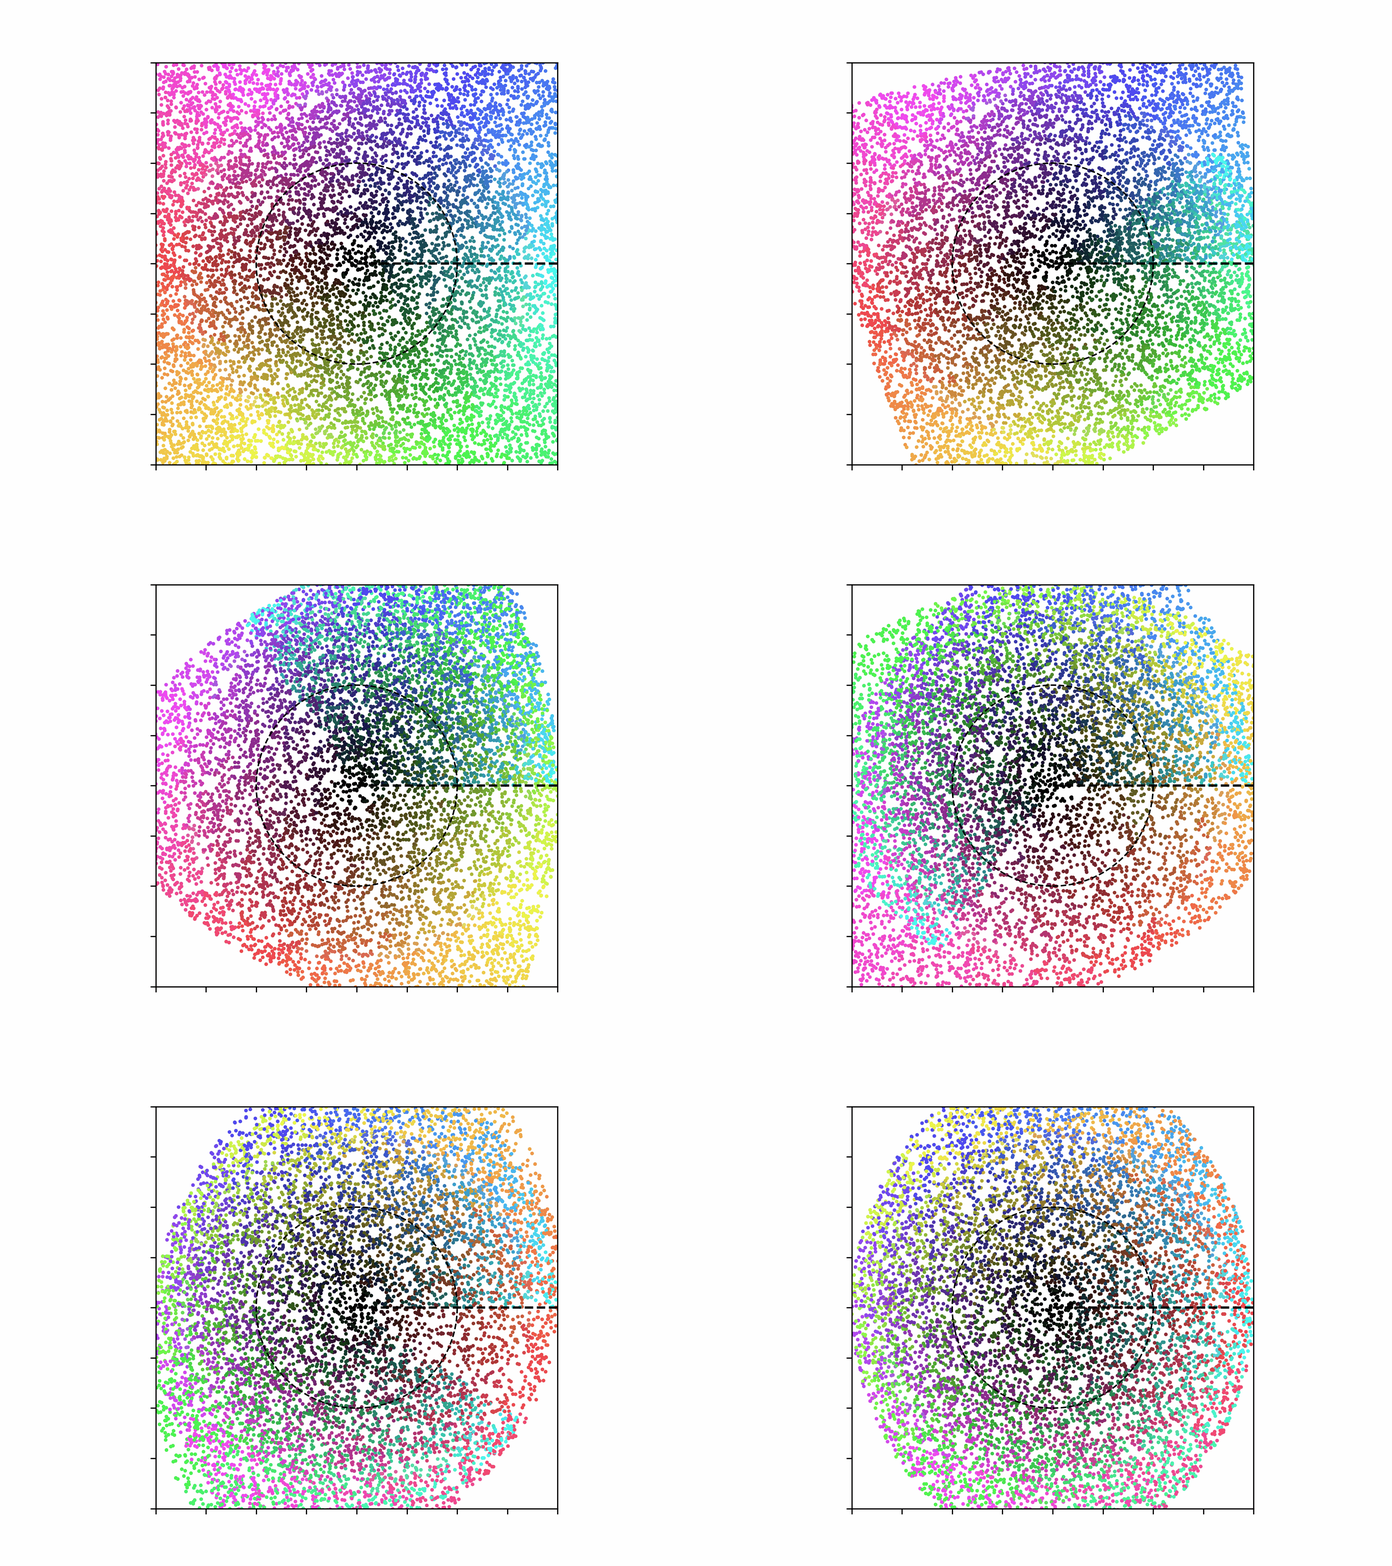
The “edge” that you see crossing the screen (as well as the fact that you didn’t see an edge in the “rotation-based” animation of step 1) is partly an artifact of the way I rendered the points, which go a bit past the edge of the box, but not infinitely far away. Here’s what it looks like if the points only reach the edge of the box, but no further:
Step 1 depicted as a linear movement, where no dancers start outside the viewing field And here’s the same for the initial “rotation-based” variant of step 1:
Step 1 depicted as a rotation-based movement, where no dancers start outside the viewing field Somehow this makes the animation looks more complicated (despite it technically involving fewer moving parts), which is why I’m leaving all this in the footnote to a footnote.
Very pretty, and simple enough that I could show it to a kid. Also, it is a good thing that you didn’t use rectilinear co-ordinates in this, otherwise Descartes might have found it weird. Because ironically, he basically never used rectilinear co-ordinates. Instead, he just measured lengths along any two intersecting lines in whatever geometric construction he had.
Thanks for the kind words! It’s always fascinating to see how mathematicians of the past actually worked out their results, since it’s so often different from our current habits of thinking. Thinking about it, I could probably have also tried to make this accessible to the ancient Greeks by only using a ruler and compass—tools familiar to the ancients due to their practical use in, e.g. laying fences to keep horses within a property, etc.—to construct the Mandelbrot set, but ultimately…. I decided to put Descartes before the horse.
(I’m so sorry)
For a wonderful visualization of complex math, see https://acko.net/blog/how-to-fold-a-julia-fractal/
This link primarily focuses on the related Julia fractal instead of the Mandelbrot as done here, with the advantage that you can smoothly fold in reverse to find the set that doesn’t escape.
This is a great read!! I actually stumbled across it halfway through writing this article, and kind of considered giving up at that point, since he already explained things so well. Ended up deciding it was worth publishing my own take as well, since the concept might click differently with different people.
You can actually do this with the Mandelbrot Waltz as well! Of course you still need to know each point’s starting position in order to subtract that for Step 3, but assuming you know that, you can do exactly the same thing, I believe.
I’m personally very glad you nevertheless decided to go ahead and publish this (pedagogically beautiful) essay; I’m already mentally drawing up a list of friends to share this with :)
With Julia, step 3 is all dancers moving in the same direction in unison. This is a smooth non-intersecting movement just like the inverted steps one and two. With Mandelbrot, the dancers will move somewhat chaotically in step 3, inevitably colliding.
You don’t mention it, but this construction can be performed straightedge-and-compass. So it’s real geometry.
By the way, if any actual mathematicians are reading this, I’d be really curious to know if this way of thinking about the Mandelbrot Set would be of any practical benefit (besides educational and aesthetic value of course). For example, I could imagine a formalization of this being used to pose non-trivial questions which wouldn’t have made much sense to talk about previously, but I’m not sure if that would actually be the case for a trained mathematician.
I usually think of the field of complex numbers algebraically, but one can also think of the real numbers, complex numbers, and quaternions geometrically. The real numbers are good with dealing with 1 dimensional space, and the complex numbers are good for dealing with 2 dimensional space geometrically. While the division ring of quaternions is a 4 dimensional algebra over the field of real numbers, the quaternions are best used for dealing with 3 dimensional space geometrically.
For example, if U,V are open subsets of some Euclidean space, then a function f:U→V is said to be a conformal mapping when it preserves angles and the orientation. We can associate the 2-dimensional Euclidean space with the field of complex numbers, and the conformal mappings between open subsets of 2-dimensional spaces are just the complex differentiable mappings. For the Mandelbrot set, we need this conformality because we want the Mandelbrot set to look pretty. If the complex differentiable maps were not conformal, then the functions that we iterate in complex dynamics would stretch subsets of the complex plane in one dimension and expand them in the other dimension and this would result in a fractal that looks quite stretched in one real dimension and squashed in another dimension (the fractals would look like spaghetti; oh wait, I just looked at a 3D fractal and it looks like some vegetable like broccoli). This stretching and squashing is illustrated by 3D fractals that try to mimic the Mandelbrot set but without any conformality. The conformality is why the Julia sets are sensible (mathematicians have proven theorems about these sets) for any complex polynomial of degree 2 or greater.
For the quaternions, it is well-known that the dot product and the cross product operations on 3 dimensional space can be described in terms of the quaternionic multiplication operation between purely imaginary quaternions.
I would be very surprised if it did: I think complex numbers are simply just that good, with no downside that a framing that avoids them, such as this, sidesteps.
To be quite frank, you’re avoiding complex numbers only in the sense that you spell out the operations involved in handling complex numbers explicitly—so of course there’s no added benefit, you’re simply lifting the lid of the box...
That being said, as you discover by decomposing complex multiplication into it’s parts (rotation and scaling), you get to play with them separately, which already leads you to discover interesting new variations on the theme.